Search Results: "tach"

27 July 2023

Louis-Philippe V ronneau: My new friend Ted

About 6 months ago, I decided to purchase a bike trailer. I don't drive and although I also have a shopping caddy, it often can't handle a week's groceries. The trailer, attached to my bike, hauling two storage crates Since the goal for the trailer was to haul encumbering and heavy loads, I decided to splurge and got a Surly Ted. The 32" x 24" flat bed is very versatile and the trailer is rated for up to 300 lbs (~135 kg). At around 30 lbs (~13.5 kg), the trailer itself is light enough for me to climb up the stairs to my apartment with it. Having seldom driven a bike trailer before, I was at first worried about its handling and if it would jerk me around (as some children's chariots tend to). I'm happy to report the two pronged hitch Surly designed works very well and lets you do 180 turns effortlessly. The trailer on my balcony, ready to be hoisted So far, I've used the trailer to go grocery shopping, buy bulk food and haul dirt and mulch. To make things easier, I've purchased two 45L storing crates from Home Depot and added two planks of wood on each side of the trailer to stabilise things when I strap the crates down to the bed. Since my partner and I are subscribed to an organic farmer's box during the summer and get baskets from Lufa during the winter, picking up our groceries at the pick-up point is as easy as dumping our order in the storing crates and strapping them back to the trailer. The pulleys on the roof of my balcony Although my housing cooperative has a (small) indoor bicycle parking space, my partner uses our spot during the summer, which means I have to store the trailer on my balcony. To make things more manageable and free up some space, I set up a system of pulleys to hoist the trailer up the air when it's not in use. I did go through a few iterations, but I'm pretty happy with the current 8 pulleys block and tackle mechanism I rigged. The trailer hoisted to the roof of the balcony All and all, this trailer wasn't cheap, but I regret nothing. Knowing Surley's reputation, it will last me many years and not having to drive a car to get around always ends up being the cheaper solution.

26 July 2023

Valhalla's Things: Elastic Neck Top

Posted on July 26, 2023
A woman wearing a top in white fabric with thin blue lines and two groups of blue lozenges near the hems. It has a square neck gathered by a yellow elastic, the blue lines are horizontal on the wide sleeves and vertical, and more spaced, on the body. 
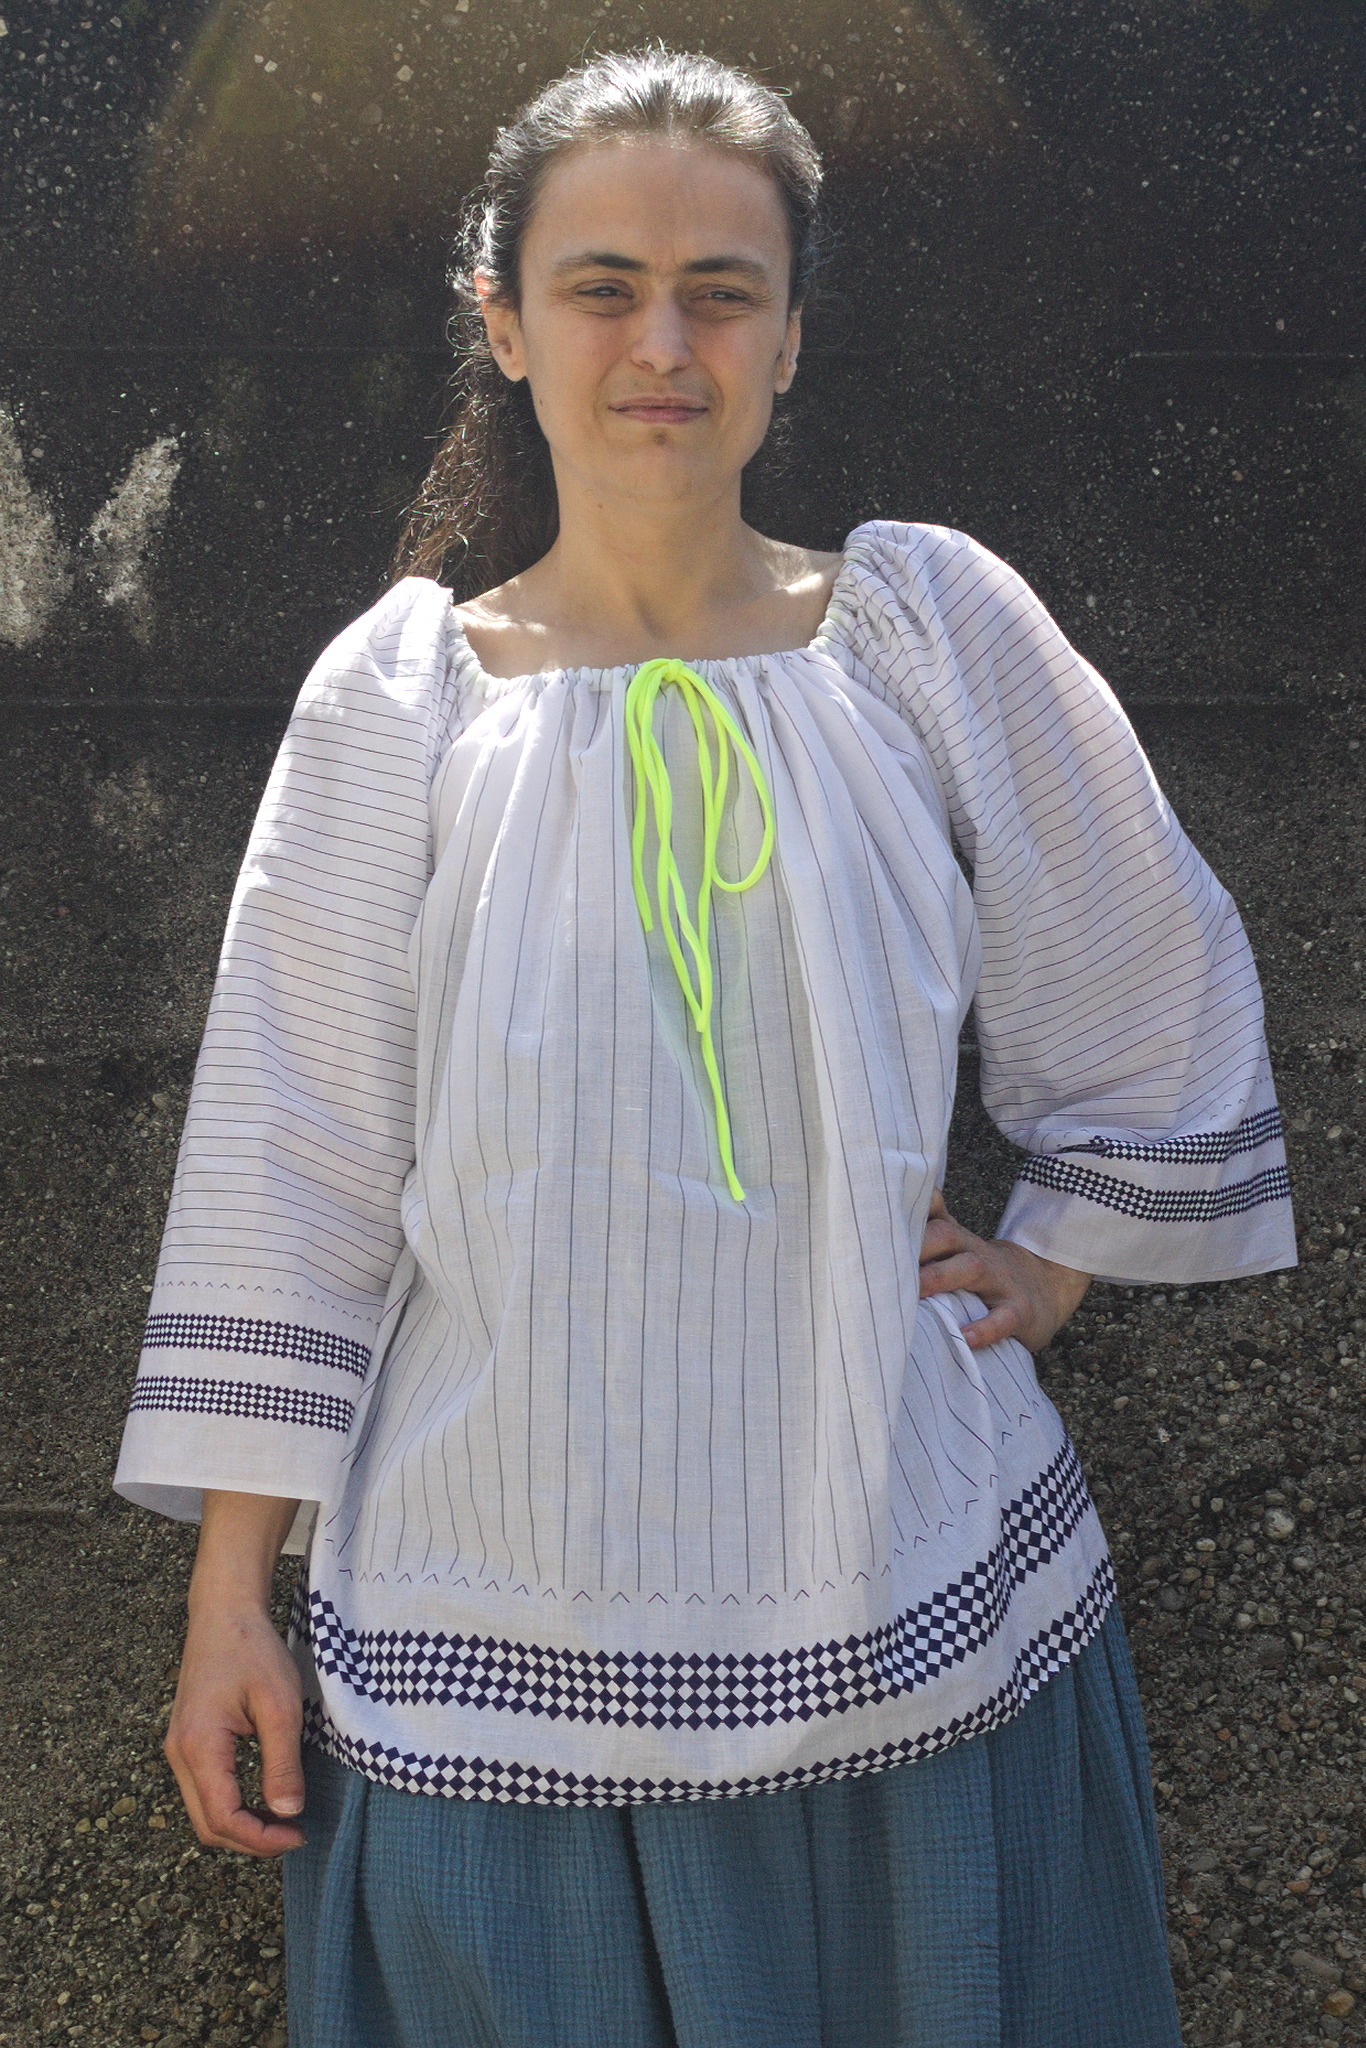
Since some time I ve been thinking about making myself a top or a dress with a wide gathered neckline that can be work at different widths, including off-the-shoulders. A few years ago I ve been gifted a cut of nice, thin white fabric with a print of lines and lozenges that isn t uniform along the fabric, but looks like it was designed for some specific garment, and it was waiting in my stash for a suitable pattern. And a few days ago, during a Sunday lunch, there was an off-hand mention of a dress from the late 1970s which had an elastic in the neckline, so that it could be optionally worn off-the-shoulders. And something snapped in place. I had plans for that afternoon, but they were scrapped, and I started to draw, measure, cut rectangles of fabric, pin and measure again, cut more fabric. The main pieces of the top laid flat: a big rectangle for the body,
two rectangular tubes for the sleeves laid so that they meet the body just at the corners, and a triangle (a square gusset folded on the diagonal) joins them to the body.
I decided on a pattern made of rectangles to be able to use as much fabric as possible, with the size of each rectangle based mostly on the various sections on the print of the fabric. I ve made the typical sleeves from a rectangle and a square gusset, and then attached them to the body just from the gusset to keep the neckline wide and low. The worn top shown from the side back: there is a strip of vertical lines spaced closer together like on the sleeves, and it continues to the bottom rather than ending with a strip of lozenges. 
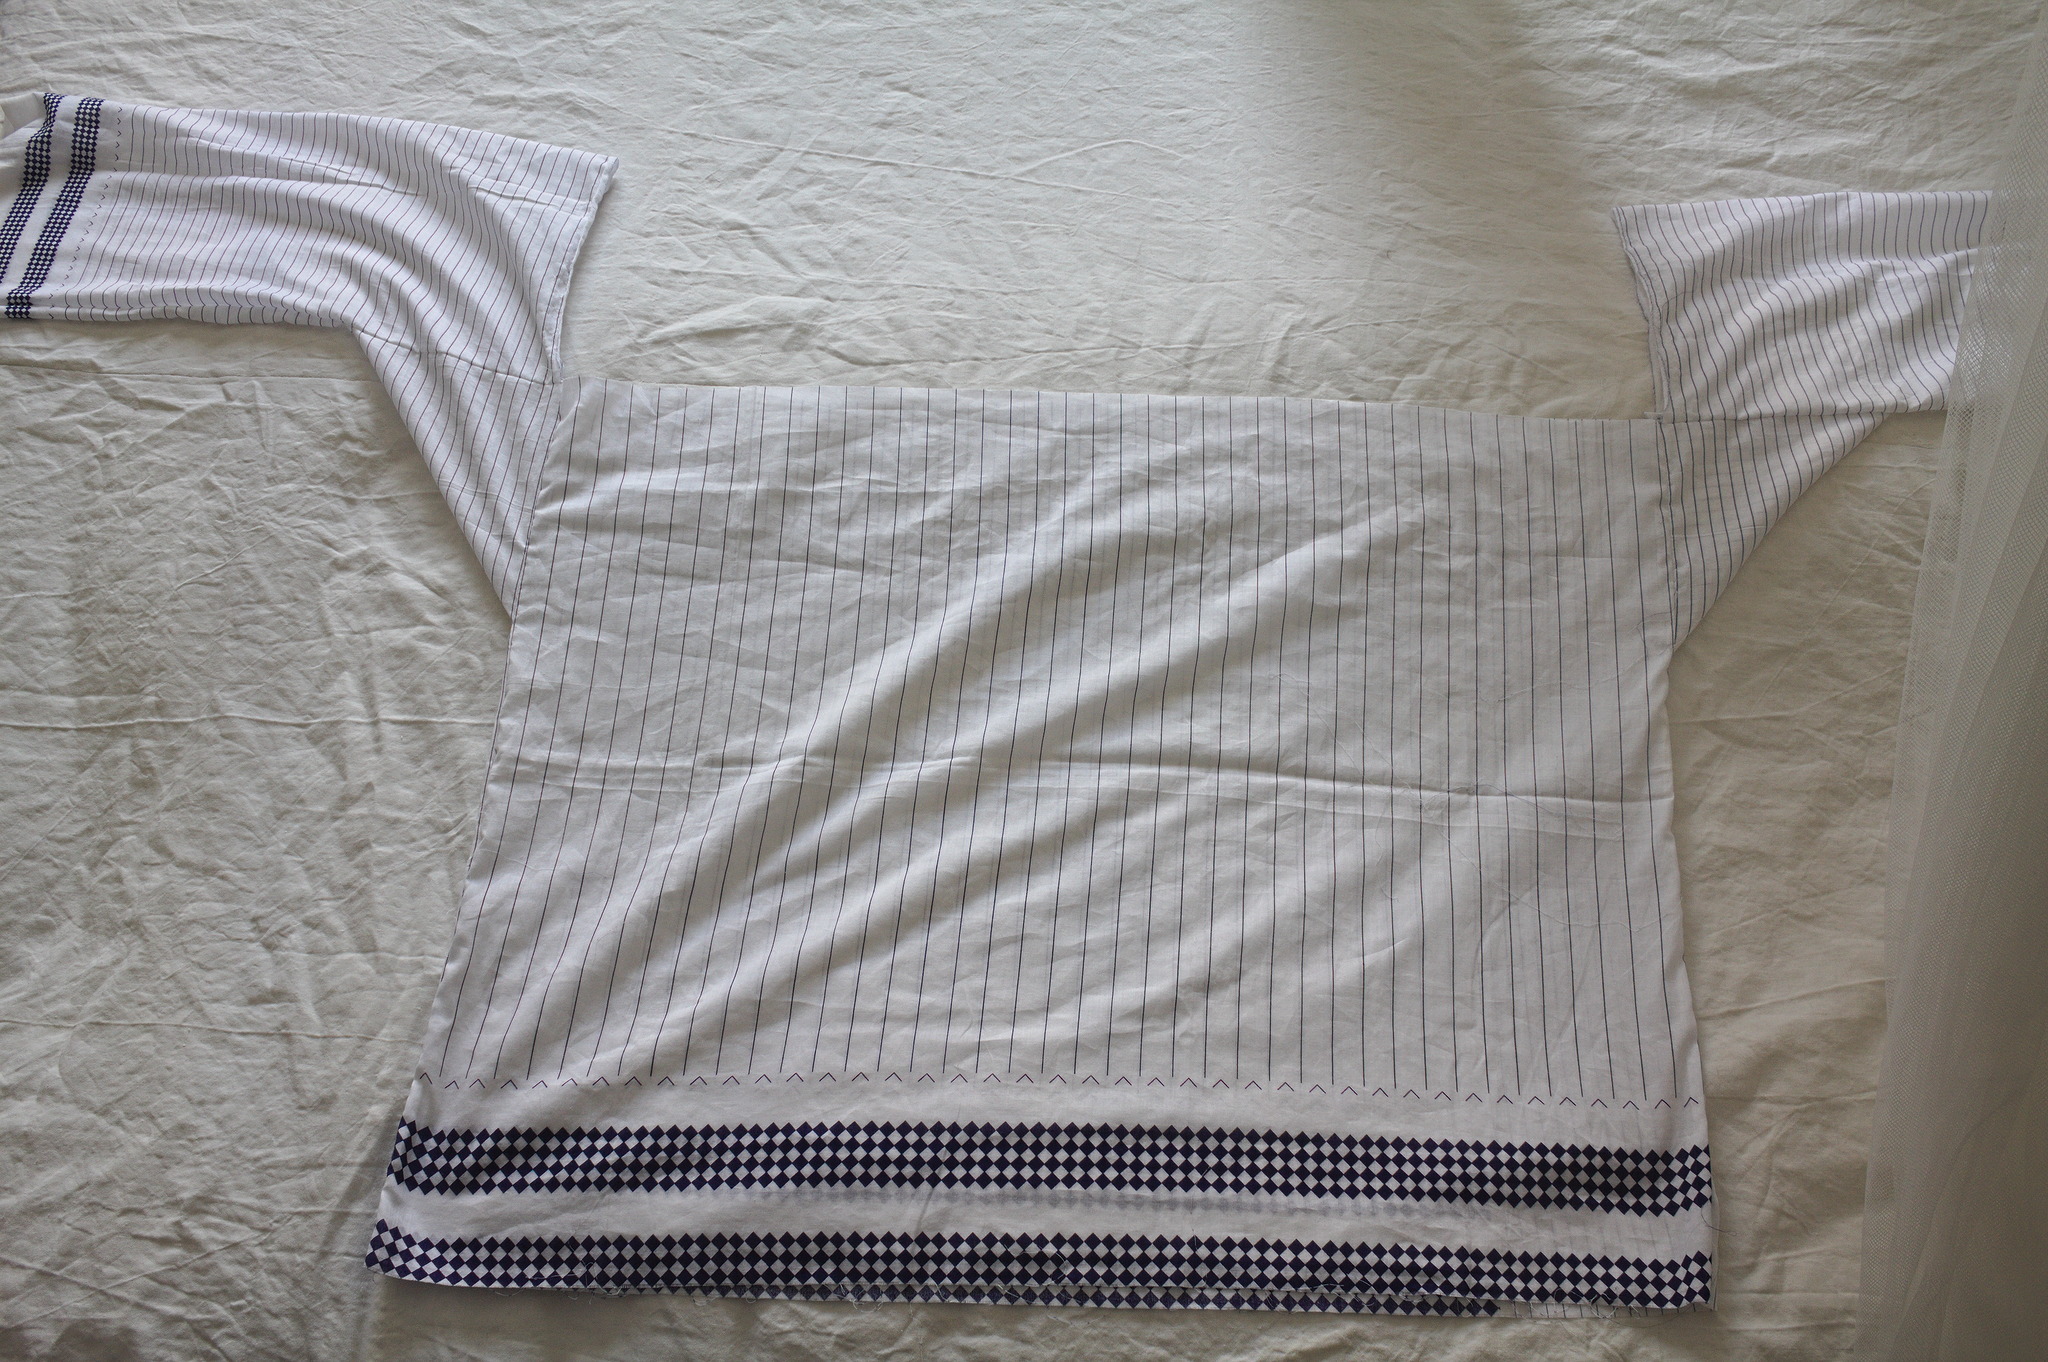
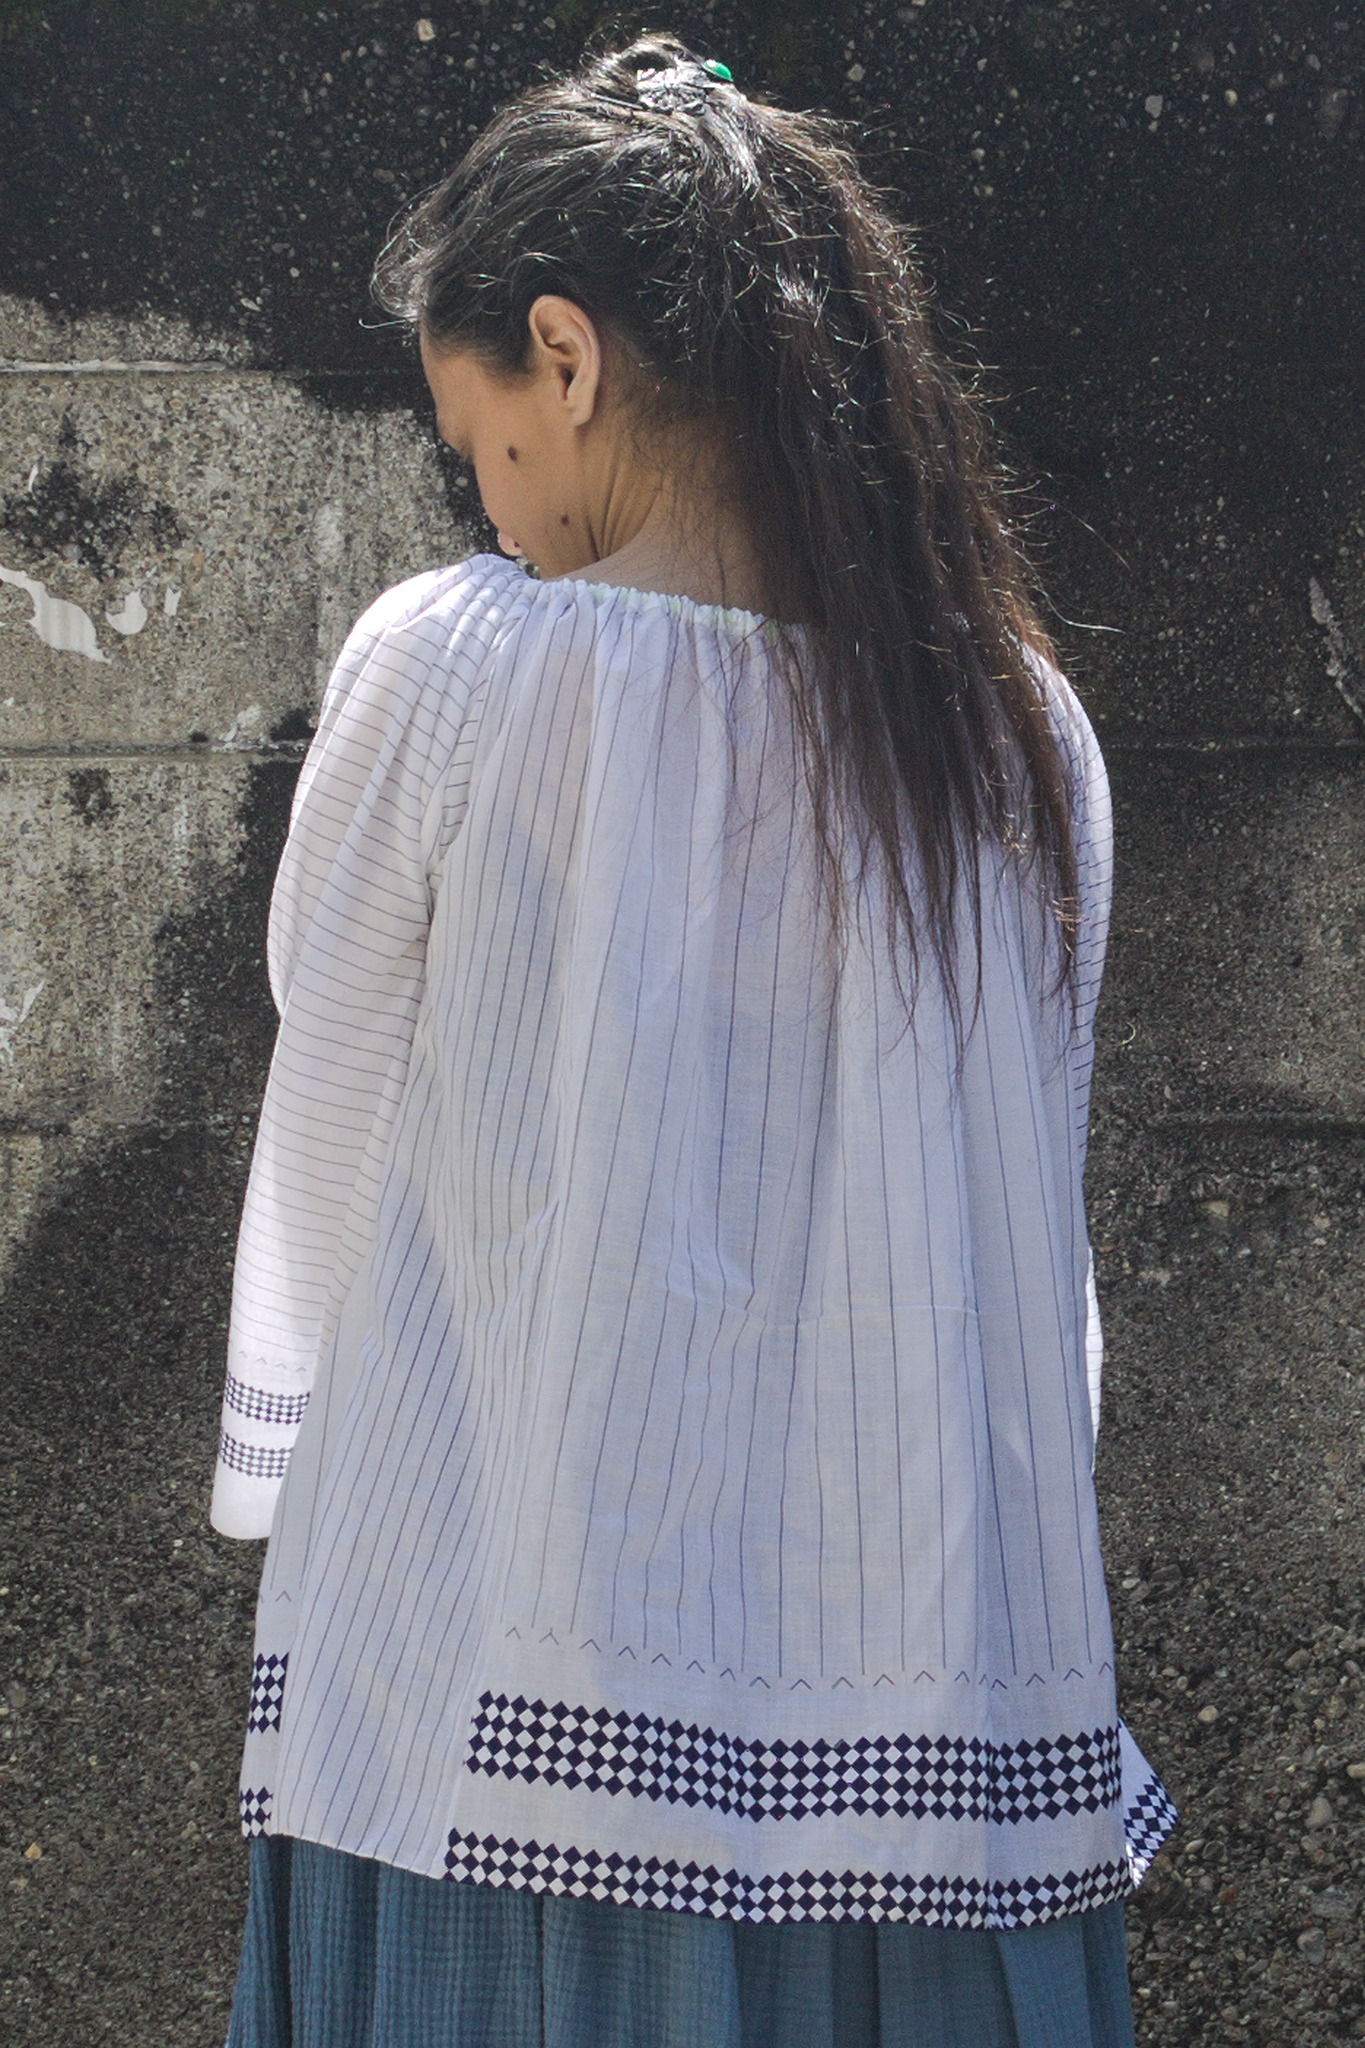
The part of the fabric with large vertical stripes had two different widths: I could have made the back narrower, but I decided to just keep a strip with narrower lines to one side. The fabric also didn t have a full second strip of lozenges, so I had to hem it halfway through it. Closeup of the center front and center back of the neckline casing, showing the matched lines. 
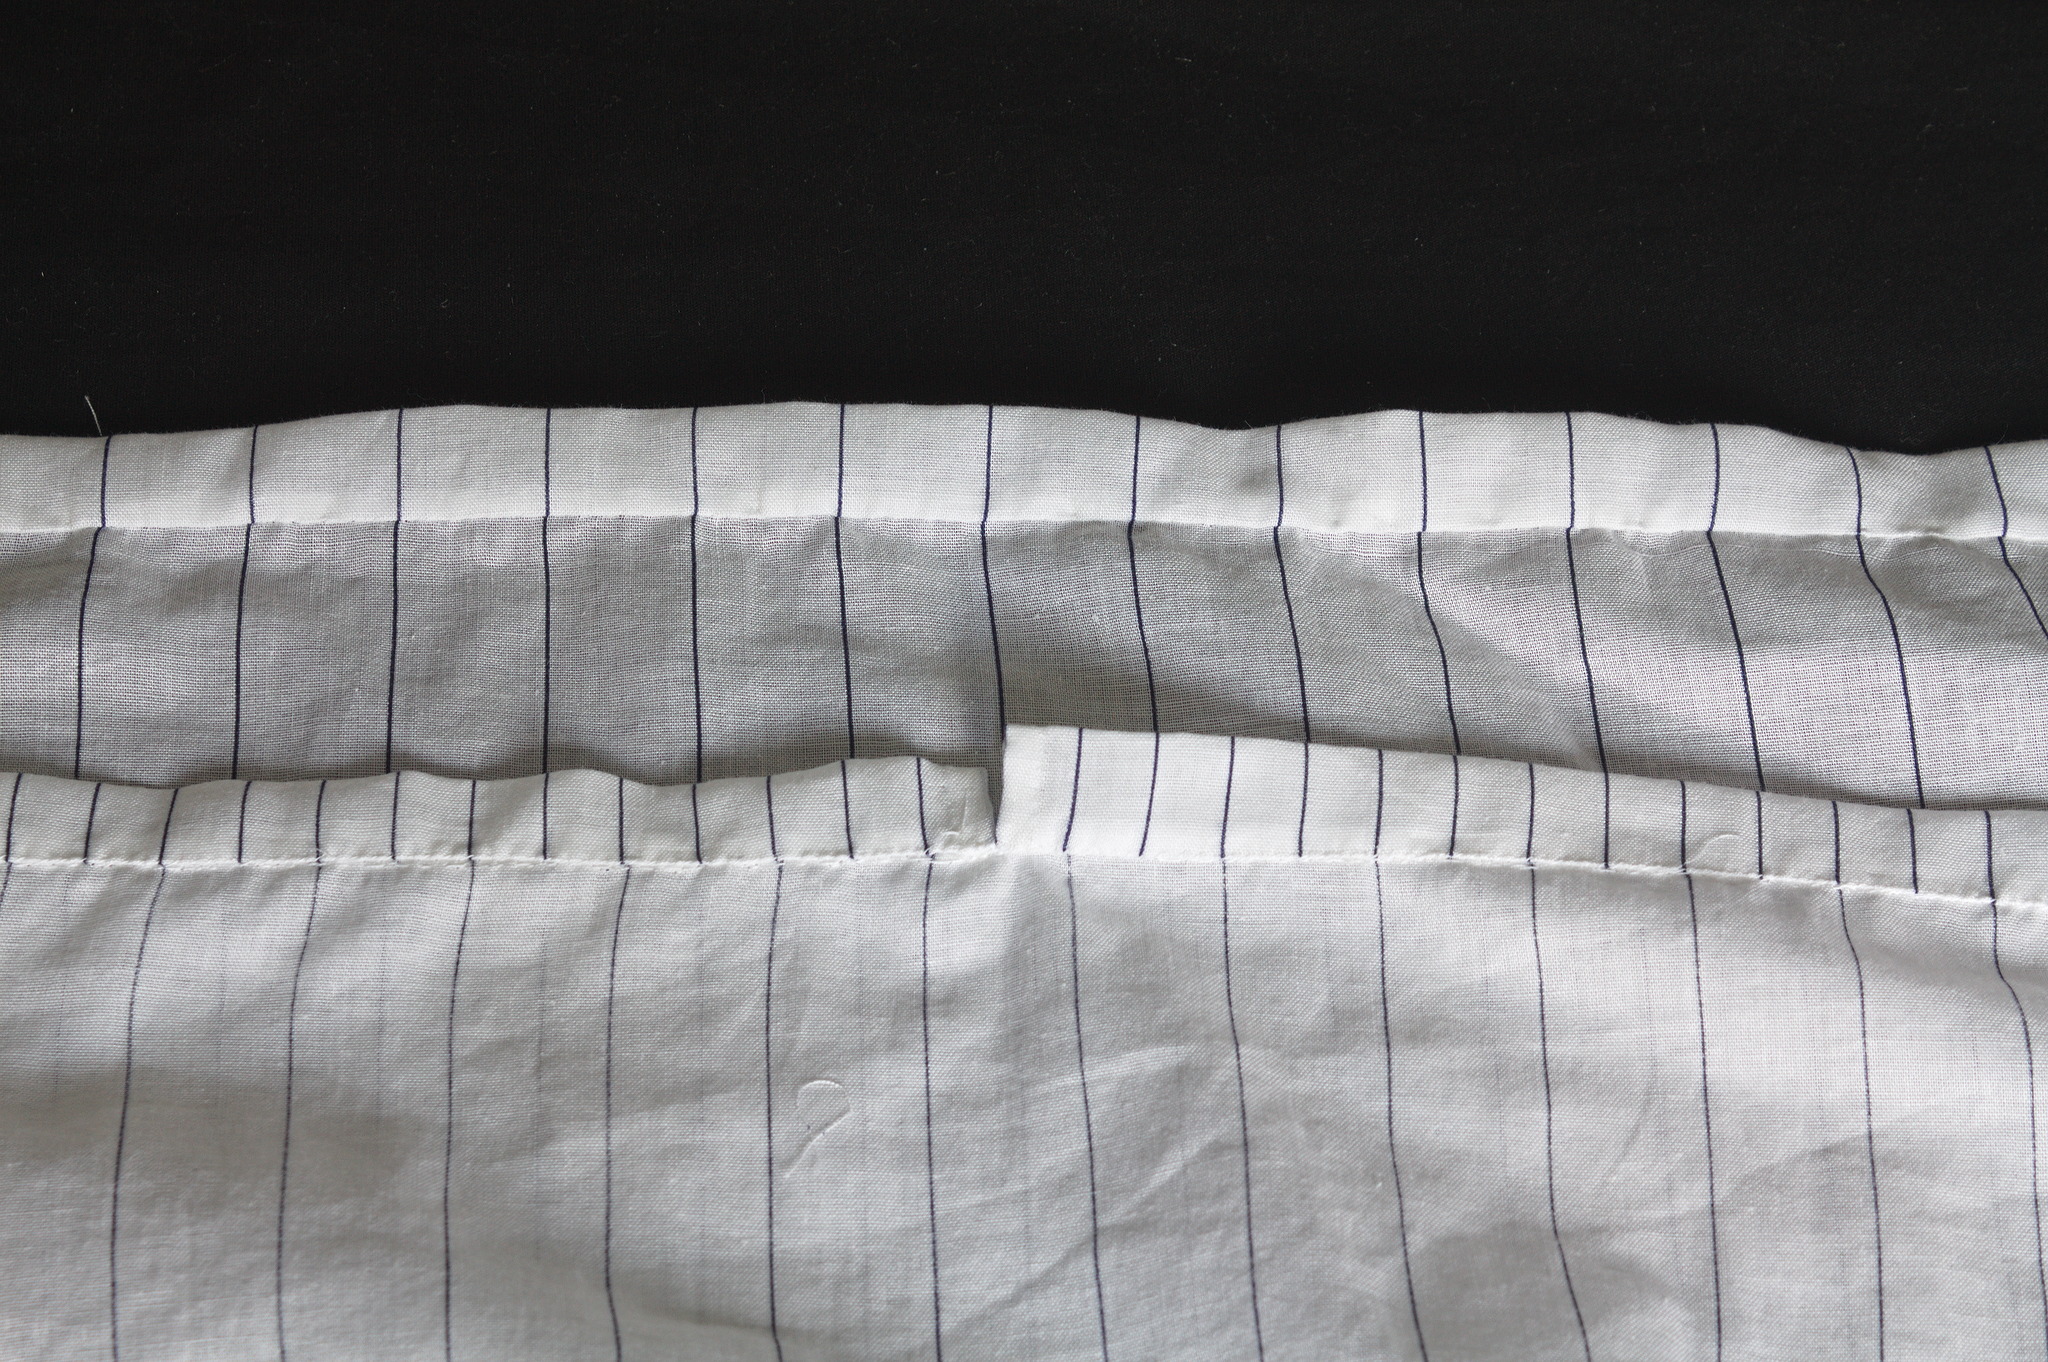
The casing for the elastic was pieced from various scraps, but at least I was able to match the lines on the center front and back, even if they are different. Not that it matters a lot, since it s all hidden in the gathering, but I would have known. And since I was working on something definitely modern, even if made out of squares and rectangles, of course I decided to hand-sew everything, mostly to be able to use quite small sewing allowances, since the fabric was pretty thin. In my stash I had a piece of swimsuit elastic that feels nice, looks nice and makes a knot that doesn t slip, so I used it. It s a perfect match, except for the neon yellow colour, which I do like, but maybe is a bit too high visibility? I will see if the haberdasher has the same elastic in dark blue, but right now this will do. It was a quick project anyway: by the end of the working week the top was finished; I think that on a sewing machine it would be easy to make it in a day. the top worn with the neckline pulled down to leave the shoulders bare. 
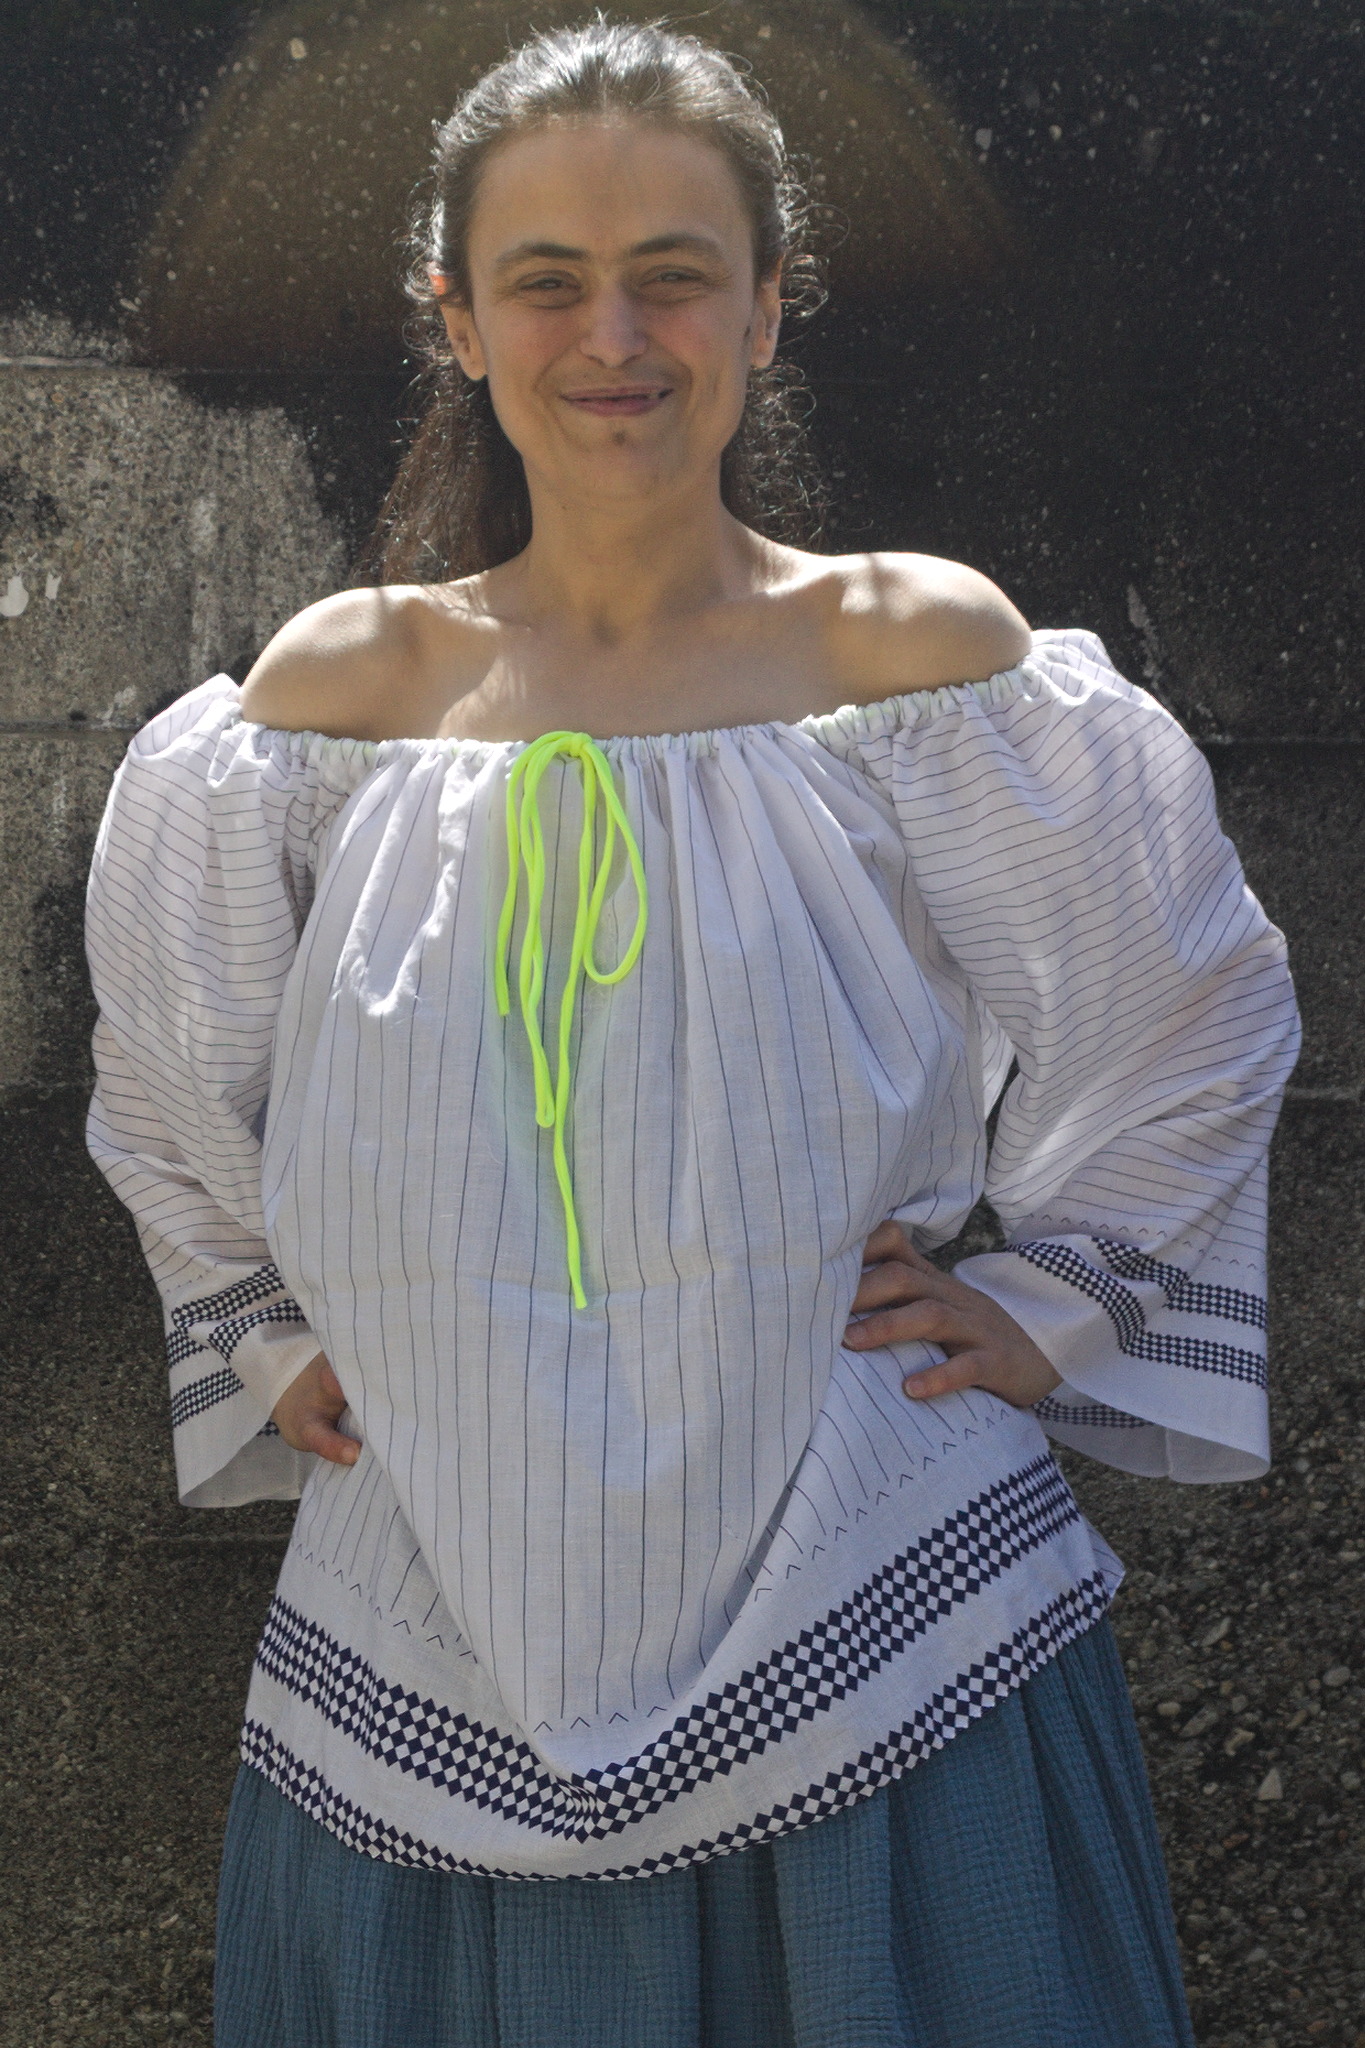
And it can be worn off the shoulders! Which is something I will probably never do in public (and definitely not outdoors), but now if I wanted I could! :D As usual, the pattern (for what pattern there is) and instructions are on my pattern website under a #FreeSoftWear license, and I ve also added to the site a tip on how I use electrician fish tape to thread things through long casings

18 July 2023

Jamie McClelland: What am I missing about AI?

Last month I blogged about how the mainstream media is focusing on the wrong parts of the Artificial Intelligence/ChatGPT story. One of the comments left on the post was:
I encourage you to dig a little deeper. If LLM s were just probability
machines, no one would be raising any flags.
Hinton, Bengio, Tegmark and many others are not simpletons. It is the fact that
the architecture and specific training (deep NN, back prop / gradient descend)
produces a system with emergent properties, beyond just a probability machine,
when the system size reaches some thresholds, that has them spooked.
They do understand mathematics and stats and probabilities, i assure you. It is
just that you may have only read the layman s articles and not the scientific
ones
I confess: I haven t made much progress in this regard. I gave Vicky Boykis' Embeddings a go, and started to get a handle on the math, but honestly had a hard time following it. I m open to suggestions from anyone with a few good recommendations for scientific papers accessible to non-math professionals, particularly ones that explain the emergent properties and what that means. Meanwhile, regardless of the scientific truths or falsehoods around chat GPT, the mainstream media continues to miserably fail in helping the rest of us understand the implications of this technology. Most recently, I listend to This American Life s First Contact (part of their Greetings People of Earth show). They interviewed several Microsft AI researchers who first experimented with ChatGPT 4 prior to it s big release. The focus of the researchers was: can we demonstrate chat GPT s general intelligence ability by presenting it with logic problems it could not possibly have encountered before? And the answer: YES! The two examples were:
  1. Stacking: the researcher asked chat GPT how to stack a number of odd objects in a stable way (a book, a dozen eggs, a nail, etc) and chat GPT gave both the correct answer and a reasonable explanation of why.
  2. Hidden state: the researcher described two people in a room with a cat. One person put the cat in a basket and left. The other moved the cat to a box ad left. And, remarkably, chat GPT could explain that when they returned, the first person would think the cat is in the basket and the second person would know it s in the box.
I thought this was pretty cool. So I fired up chat GPT (and even ponied up for chat GPT version 4). I asked it my own stacking question and, hm, chat GPT thought a plate should be placed on top of a can of soda instead of beneath it. So, well, mostly right but I m pretty sure any reasonable human would put the can of soda on the plate not the other way around (chat GPT 3.5 wanted the can of soda to be balanced on the tip of the nail). I then asked it my own simple version of the cat problem and it got it right. Very good. But when I asked it a much more complicated and weird version of the cat problem (involving beetles in a mansion with a movie theater and changing movies and a butler with a big mustache) it got the answer flat out wrong. Did anyone at This American Life try this? Really? It seems like a basic responsibility of journalism to fact check the experts. Maybe the scientists would have had a convincing response? Or maybe scientists are just like everyone else and can get caught up in the excitement and make mistakes? I am amazed and awed by what chat GPT can do - it truly is remarkable. And, I think that a lot of human intelligence is synthesizing what we ve seen and simply regurgitating it in a different context - a task that chat GPT is way better at doing than we are. But the overriding message of most mainstream media stories is that chat GPT is somehow going beyond word synthesis and probability and magically tapping into a form of logic. If the scientific papers are demonstrating this remarkable feat, I think the media needs to do a way better job reporting it.

12 July 2023

Matt Brown: 2023 Mid Year Review

I m six months into my journey of building a business which means its time to reflect and review the goals I set for the year.

No further investment in co2mon.nz In March I made the decision to focus on completing the market research for co2mon.nz. The results of that research led to two key conclusions:
  1. Indoor air quality/ventilation is not a problem many people are actively thinking about or looking to spend money to improve.
  2. Even when introduced to the problem and educated about the need, most people are looking for a one-off expense or solution (e.g. the physical monitor) and are much less interested in a monitoring software service.
Based on that, it was clear that this is not an opportunity that I should continue pursuing and I ve put co2mon.nz into maintenance mode. I ve committed to maintaining the infrastructure to support existing customers, but I won t be investing time or energy in developing it further.

Discipline in selecting product opportunities The decision to stop investing more time into co2mon.nz was straightforward given the results of the research, but it was also painful given the time I ve already sunk into it. I hindsight it s clear that my enthusiasm to solve a problem with technology I enjoyed was my driving force rather than a deep understanding of the wants and needs of potential customers. I don t entirely regret trying my luck once - but it s not time efficient and I know that following that pattern again is not a sustainable or viable path to building a successful business. I ve decided to use the following list of questions to bring more discipline to how I evaluate product opportunities in future:
  1. Problem: Is this something that a sizeable number of people are struggling with AND are willing to spend money solving?
  2. Capability: Can I deliver a solution that solves the problem in a reliable and cost-effective way?
  3. Excitement: Am I excited and motivated to invest time in building the solution to this problem?
  4. Trust: Do I have the expertise and experience to be trusted to solve the problem by potential customers?
  5. Execution: Can I package, market and sell that solution in a profitable manner?
My plan is to answer these questions and then make an evaluation of the potential before I commit time to building any part of a product. As an example of how I think that will help, here s what I think the answer to those questions for ventilation monitoring would have been:
  1. Problem: No - as the market research eventually showed.
  2. Capability: Low - The part of the solution which customers primarily value (the hardware) is complex and outside of my core experience. The software I can easily deliver is not where the value is seen.
  3. Excitement: Yes - this was the primary driver of starting the project.
  4. Trust: Low - I m trusted to build software, but cannot claim any specific expertise in air quality and ventilation.
  5. Execution: Low confidence - These skills are not ones I ve exercised a lot in my career to date.
What these answers point to is that identifying the problem alone is not enough. I don t expect every question to have a perfect answer, but I want to hold myself to only pursuing opportunities where there s only one major area of doubt. In this case, even had the market research demonstrated a problem that many customers would pay to solve, there were still some big answers missing to the trust, capability and execution questions. Overall my conclusion is that co2mon.nz was not the ideal business to start my journey with given the number of open questions in the plan. I like to think that conclusion would also have been clear to me six months ago had I taken the time to go through this process then!

Prioritising areas of growth Applying those questions to my other product ideas results in a lot of I don t know yet answers to the problem and capability questions, further reinforcing the lesson that I need to spend more understanding if there is a problem with a viable business model attached in those areas before progressing any of those ideas. Beyond that lesson, a more interesting observation comes from the last question regarding execution. My answers to the first four questions vary between ideas, but my answers to this last question are always the same - I don t have a lot of confidence in my sales and marketing skills to sell a product. That s not a surprise. My career to date has been focused on software development and leadership, I don t have a lot of experience with sales and marketing. The opportunity to grow and develop those skills is actually a large part of my motivation for choosing the path of building my own business. But seeing that this is a common factor that will need significant investment regardless of which opportunity I pursue sends me a strong signal that I should focus on growth in this area as a priority. Following that logic through to the next step of what creating that focus would look like reveals a conflict: The nature of the mission I ve set for myself draws me to products in areas that are new to me, which means there s also a need to invest in building expertise in those areas. Again not a surprise, but the time and focus required to develop that expertise competes with time spent growing my sales and marketing skills. So I have a prioritisation problem. Solving it is going to require changing the type of product I m trying to build in the short term: I need to build a product that uses my existing expertise and strengths as much as possible, so that I can put the majority of my energy into growing the core business skills where my confidence is currently lacking. Trying to deliver meaningful improvements to a big problem in an area I don t have past experience in while also learning how to sell and market a product is biting off more than I chew right away.

Changing the goal posts With those lessons in hand I m making three changes to my 2023 Goals:
  1. Reducing the product development goal from several ideas to two. The first was co2mon.nz. The second will be drawn from my existing expertise - not one of the previously stated ideas that require me to develop expertise in a new area.
  2. Moving the consulting and product development goals to be alternatives - I expect I can achieve at most one of them this year.
  3. Reducing the publishing target for this site from at least once a week to once a month . I thought I d have more to say this year, but the words are coming very slowly to me.
Reducing scope and ambition is humbling, but that s reality. I hope it turns out to be a case of slow down and lay the foundations in order to then move faster. The good news is that I don t feel the need to make any changes to the vision, mission and strategy I m following - I think they re still the right destination and overall path for me even though the first six months has proven bumpy. I just need to be a bit more realistic on the short-term goals that will feed into them.

The next few months I m choosing to prioritise the product development goal. I m aiming to complete the market research/problem definition phase for a product opportunity I ve identified in the SRE/DevOps space (where my previous experience is) and make a decision on whether to start development by mid August. In making that decision I plan to gather the answers to my questions, and then diligently evaluate whether the opportunity is worth committing to or not. I will write more about this process in coming weeks. If I decide to proceed that gives me 2-3 months to get an MVP in the hands of customers and get concrete validation of whether the product has revenue and growth potential before the end of the year. Tight, but if things go well, and I don t take any further consulting work, there s a reasonable chance I can complete the revised goal successfully. In the event that I decide the product opportunity I m currently researching is not the right one to commit to, I will likely revert to focusing on my consulting goal in the remaining 2-3 months of the year rather than attempt a third product development iteration. Thanks for reading this far! As always, I d love your thoughts and feedback.

Appendix: Revised 2023 Goals Putting all that together, the ultimate outcome of this review (including updated progress scoring) looks like:
  1. Execute a series of successful consulting engagements, building a reputation for myself and leaving happy customers willing to provide testimonials that support a pipeline of future opportunities. Score: 3/10 - I focused entirely on co2mon.nz during April, May and June to the detriment of my pipeline of consulting work. This score is unlikely to improve given the above plan unless I decide not to commit to developing the idea I m currently investigating.
  2. Grow my product development skill set by taking two ideas (co2mon.nz, an SRE/DevOps focused product) to MVP stage with customer feedback received, and generate revenue and has growth potential from one of them. Score: 4/10 - I launched co2mon.nz and got feedback, I discovered it didn t solve a problem relevant to customers and therefore did not generate substantial revenue or growth potential. Idea number two is in still in progress.
  3. Develop and maintain a broad professional network.
    1. To build a professional relationship with at least 30 new people this year. Score: 6/10 - This is going well. On track for a 10/10 score.
    2. To publish a piece of writing on this site once a month and for many of those to generate interesting conversations and feedback. Score: 6/10 - 4 out of 6 months have featured a post meeting this goal so far.
    3. To support the growth of my local technical community by volunteering my experience and knowledge with others. Score: 5/10 - I ve given one talk and helped with SREcon23 APAC, but not as much other work in this area as I d like.

John Goerzen: Backing Up and Archiving to Removable Media: dar vs. git-annex

This is the fourth in a series about archiving to removable media (optical discs such as BD-Rs and DVD+Rs or portable hard drives). Here are the first three parts: I want to state at the outset that this is not a general review of dar or git-annex. This is an analysis of how those tools stack up to a particular use case. Neither tool focuses on this use case, and I note it is particularly far from the more common uses of git-annex. For instance, both tools offer support for cloud storage providers and special support for ssh targets, but neither of those are in-scope for this post. Comparison Matrix As part of this project, I made a comparison matrix which includes not just dar and git-annex, but also backuppc, bacula/bareos, and borg. This may give you some good context, and also some reference for other projects in this general space. Reviewing the Goals I identified some goals in part 1. They are all valid. As I have thought through the project more, I feel like I should condense them into a simpler ordered list, with the first being the most important. I omit some things here that both dar and git-annex can do (updates/incrementals, for instance; see the expanded goals list in part 1). Here they are:
  1. The tool must not modify the source data in any way.
  2. It must be simple to create or update an archive. Processes that require a lot of manual work, are flaky, or are difficult to do correctly, are unlikely to be done correctly and often. If it s easy to do right, I m more likely to do it. Put another way: an archive never created can never be restored.
  3. The chances of a successful restore by someone that is not me, that doesn t know Linux, and is at least 10 years in the future, should be maximized. This implies a simple toolset, solid support for dealing with media errors or missing media, etc.
  4. Both a partial point-in-time restore and a full restore should be possible. The full restore must, at minimum, provide a consistent directory tree; that is, deletions, additions, and moves over time must be accurately reflected. Preserving modification times is a near-requirement, and preserving hard links, symbolic links, and other POSIX metadata is a significant nice-to-have.
  5. There must be a strategy to provide redundancy; for instance, a way for one set of archive discs to be offsite, another onsite, and the two to be periodically swapped.
  6. Use storage space efficiently.
Let s take a look at how the two stack up against these goals. Goal 1: Not modifying source data With dar, this is accomplished. dar --create does not modify source data (and even has a mode to avoid updating atime) so that s done. git-annex normally does modify source data, in that it typically replaces files with symlinks into its hash-indexed storage directory. It can instead use hardlinks. In either case, you will wind up with files that have identical content (but may have originally been separate, non-linked files) linked together with git-annex. This would cause me trouble, as well as run the risk of modifying timestamps. So instead of just storing my data under a git-annex repo as is its most common case, I use the directory special remote with importtree=yes to sort of import the data in. This, plus my desire to have the repos sensible and usable on non-POSIX operating systems, accounts for a chunk of the git-annex complexity you see here. You wouldn t normally see as much complexity with git-annex (though, as you will see, even without the directory special remote, dar still has less complexity). Winner: dar, though I demonstrated a working approach with git-annex as well. Goal 2: Simplicity of creating or updating an archive Let us simply start by recognizing this: Both tools have a lot of power, but I must say, it is easier to wrap my head around what dar is doing than what git-annex is doing. Everything dar does is with files: here are the files to archive, here is an archive file, here is a detached (isolated) catalog. It is very straightforward. It took me far less time to develop my dar page than my git-annex page, despite having existing familiarity with both tools. As I pointed out in part 2, I still don t fully understand how git-annex syncs metadata. Unsolved mysteries from that post include why the two git-annex drives had no idea what was on the other drives, and why the export operation silenty did nothing. Additionally, for the optical disc case, I had to create a restricted-size filesystem/dataset for git-annex to write into in order to get the desired size limit. Looking at the optical disc case, dar has a lot of nice infrastructure built in. With pause and execute, it can very easily be combined with disc burning operations. slice will automatically limit the size of a given slice, regardless of how much disk space is free, meaning that the git-annex tricks of creating smaller filesystems/datasets are unnecessary with dar. To create an initial full backup with dar, you just give it the size of the device, and it will automatically split up the archive, with hooks to integrate for burning or changing drives. About as easy as you could get. With git-annex, you would run the commands to have it fill up the initial filesystem, then burn the disc (or remove the drive), then run the commands to create another repo on the second filesystem, and so forth. With hard drives, with git-annex you would do something similar; let it fill up a repo on a drive, and if it exits with a space error, swap in the next. With dar, you would slice as with an optical disk. Dar s slicing is less convenient in this case, though, as it assumes every drive is the same size and yours may not be. You could work around that by using a slice size no bigger than the smallest drive, and putting multiple slices on larger drives if need be. If a single drive is large enough to hold your entire data set, though, you need not worry about this with either tool. Here s a warning about git-annex: it won t store anything beneath directories named .git. My use case doesn t have many of those. If your use case does, you re going to have to figure out what to do about it. Maybe rename them to something else while the backup runs? In any case, it is simply a fact that git-annex cannot back up git repositories, and this cuts against being able to back up things correctly. Another point is that git-annex has scalability concerns. If your archive set gets into the hundreds of thousands of files, you may need to split it into multiple distinct git-annex repositories. If this occurs and it will in my case it may serve to dull the shine of some of git-annex s features such as location tracking. A detour down the update strategies path Update strategies get a little more complicated with both. First, let s consider: what exactly should our update strategy be? For optical discs, I might consider doing a monthly update. I could burn a disc (or more than one, if needed) regardless of how much data is going to go onto it, because I want no more than a month s data lost in any case. An alternative might be to spool up data until I have a disc s worth, and then write that, but that could possibly mean months between actually burning a disc. Probably not good. For removable drives, we re unlikely to use a new drive each month. So there it makes sense to continue writing to the drive until it s full. Now we have a choice: do we write and preserve each month s updates, or do we eliminate intermediate changes and just keep the most recent data? With both tools, the monthly burn of an optical disc turns out to be very similar to the initial full backup to optical disc. The considerations for spanning multiple discs are the same. With both tools, we would presumably want to keep some metadata on the host so that we don t have to refer to a previous disc to know what was burned. In the dar case, that would be an isolated catalog. For git-annex, it would be a metadata-only repo. I illustrated both of these in parts 2 and 3. Now, for hard drives. Assuming we want to continue preserving each month s updates, with dar, we could just write an incremental to the drive each month. Assuming that the size of the incremental is likely far smaller than the size of the drive, you could easily enough do this. More fancily, you could look at the free space on the drive and tell dar to use that as the size of the first slice. For git-annex, you simply avoid calling drop/dropunused. This will cause the old versions of files to accumulate in .git/annex. You can get at them with git annex commands. This may imply some degree of elevated risk, as you are modifying metadata in the repo each month, which with dar you could chmod a-w or even chattr +i the archive files once written. Hopefully this elevated risk is low. If you don t want to preserve each month s updates, with dar, you could just write an incremental each month that is based on the previous drive s last backup, overwriting the previous. That implies some risk of drive failure during the time the overwrite is happening. Alternatively, you could write an incremental and then use dar to merge it into the previous incremental, creating a new one. This implies some degree of extra space needed (maybe on a different filesystem) while doing this. With git-annex, you would use drop/dropunused as I demonstrated in part 2. The winner for goal 2 is dar. The gap is biggest with optical discs and more narrow with hard drives, thanks to git-annex s different options for updates. Still, I would be more confident I got it right with dar. Goal 3: Greatest chance of successful restore in the distant future If you use git-annex like I suggested in part 2, you will have a set of discs or drives that contain a folder structure with plain files in them. These files can be opened without any additional tools at all. For sheer ability to get at raw data, git-annex has the edge. When you talk about getting a consistent full restore without multiple copies of renamed files or deleted files coming back then you are going to need to use git-annex to do that. Both git-annex and dar provide binaries. Dar provides a win64 version on its Sourceforge page. On the author s releases site, you can find the win64 version in addition to a statically-linked x86_64 version for Linux. The git-annex install page mostly directs you to package managers for your distribution, but the downloads page also lists builds for Linux, Windows, and Mac OS X. The Linux version is dynamic, but ships most of its .so files alongside. The Windows version requires cygwin.dll, and all versions require you to also install git itself. Both tools are in package managers for Mac OS X, Debian, FreeBSD, and so forth. Let s just say that you are likely to be able to run either one on a future Windows or Linux system. There are also GUI frontends for dar, such as DARGUI and gdar. This can increase the chances of a future person being able to use the software easily. git-annex has the assistant, which is based on a different use case and probably not directly helpful here. When it comes to doing the actual restore process using software, dar provides the easier process here. For dealing with media errors and the like, dar can integrate with par2. While technically you could use par2 against the files git-annex writes, that s more cumbersome to manage to the point that it is likely not to be done. Both tools can deal reasonably with missing media entirely. I m going to give the edge on this one to git-annex; while dar does provide the easier restore and superior tools for recovering from media errors, the ability to access raw data as plain files without any tools at all is quite compelling. I believe it is the most critical advantage git-annex has, and it s a big one. Goal 4: Support high-fidelity partial and full restores Both tools make it possible to do a full restore reflecting deletions, additions, and so forth. Dar, as noted, is easier for this, but it is possible with git-annex. So, both can achieve a consistent restore. Part of this goal deals with fidelity of the restore: preserving timestamps, hard and symbolic links, ownership, permissions, etc. Of these, timestamps are the most important for me. git-annex can t do any of that. dar does all of it. Some of this can be worked around using mtree as I documented in part 2. However, that implies a need to also provide mtree on the discs for future users, and I m not sure mtree really exists for Windows. It also cuts against the argument that git-annex discs can be used without any tools. It is true, they can, but all you will get is filename and content; no accurate date. Timestamps are often highly relevant for everything from photos to finding an elusive document or record. Winner: dar. Goal 5: Supporting backup strategies with redundancy My main goal here is to have two separate backup sets: one that is offsite, and one that is onsite. Depending on the strategy and media, they might just always stay that way, or periodically rotate. For instance, with optical discs, you might just burn two copies of every disc and store one at each place. For hard drives, since you will be updating the content of them, you might swap them periodically. This is possible with both tools. With both tools, if using the optical disc scheme I laid out, you can just burn two identical copies of each disc. With the hard drive case, with dar, you can keep two directories of isolated catalogs, one for each drive set. A little identifier file on each drive will let you know which set to use. git-annex can track locations itself. As I demonstrated in part 2, you can make each drive its own repo, add all drives from a given drive set to a git-annex group. When initializing a drive, you tell git-annex what group it s a prt of. From then on, git-annex knows what content is in each group and will add whatever a given drive s group needs to that drive. It s possible to do this with both, but the winner here is git-annex. Goal 6: Efficient use of storage Here are situations in which one or the other will be more efficient: The winner depends on your particular situation. Other notes While not part of the goals above, dar is capable of using tapes directly. While not as common, they are often used in communities of people that archive lots of data. Conclusions Overall, dar is the winner for me. It is simpler in most areas, easier to get correct, and scales very well. git-annex does, however, have some quite compelling points. Being able to access files as plain files is huge, and its location tracking is nicer than dar s, even when using dar_manager. Both tools are excellent and I recommend them both and for more than the particular scenario shown here. Both have fantastic and responsive authors.

9 July 2023

Vasudev Kamath: Using LUKS-Encrypted USB Stick with TPM2 Integration

I use a LUKS-encrypted USB stick to store my GPG and SSH keys, which acts as a backup and portable key setup when working on different laptops. One inconvenience with LUKS-encrypted USB sticks is that you need to enter the password every time you want to mount the device, either through a Window Manager like KDE or using the cryptsetup luksOpen command. Fortunately, many laptops nowadays come equipped with TPM2 modules, which can be utilized to automatically decrypt the device and subsequently mount it. In this post, we'll explore the usage of systemd-cryptenroll for this purpose, along with udev rules and a set of scripts to automate the mounting of the encrypted USB. First, ensure that your device has a TPM2 module. You can run the following command to check:
sudo journalctl -k --grep=tpm2
The output should resemble the following:
Jul 08 18:57:32 bhairava kernel: ACPI: SSDT 0x00000000BBEFC000 0003C6 (v02
LENOVO Tpm2Tabl 00001000 INTL 20160422) Jul 08 18:57:32 bhairava kernel:
ACPI: TPM2 0x00000000BBEFB000 000034 (v03 LENOVO TP-R0D 00000830
PTEC 00000002) Jul 08 18:57:32 bhairava kernel: ACPI: Reserving TPM2 table
memory at [mem 0xbbefb000-0xbbefb033]
You can also use the systemd-cryptenroll command to check for the availability of a TPM2 device on your laptop:
systemd-cryptenroll --tpm2-device=list
The output will be something like following:
blog git:(master) systemd-cryptenroll --tpm2-device=list
PATH        DEVICE      DRIVER
/dev/tpmrm0 MSFT0101:00 tpm_tis
   blog git:(master)
Next, ensure that you have connected your encrypted USB device. Note that systemd-cryptenroll only works with LUKS2 and not LUKS1. If your device is LUKS1-encrypted, you may encounter an error while enrolling the device, complaining about the LUKS2 superblock not found. To determine if your device uses a LUKS1 header or LUKS2, use the cryptsetup luksDump <device> command. If it is LUKS1, the header will begin with:
LUKS header information for /dev/sdb1
Version:        1
Cipher name:    aes
Cipher mode:    xts-plain64
Hash spec:      sha256
Payload offset: 4096
Converting from LUKS1 to LUKS2 is a simple process, but for safety, ensure that you backup the header using the cryptsetup luksHeaderBackup command. Once backed up, use the following command to convert the header to LUKS2:
sudo cryptsetup convert --type luks2 /dev/sdb1
After conversion, the header will look like this:
Version:        2
Epoch:          4
Metadata area:  16384 [bytes]
Keyslots area:  2064384 [bytes]
UUID:           000b2670-be4a-41b4-98eb-9adbd12a7616
Label:          (no label)
Subsystem:      (no subsystem)
Flags:          (no flags)
The next step is to enroll the new LUKS key for the encrypted device using systemd-cryptenroll. Run the following command:
sudo systemd-cryptenroll --tpm2-device=/dev/tpmrm0 --tpm2-pcrs="0+7" /dev/sdb1
This command will prompt you to provide the existing key to unseal the device. It will then add a new random key to the volume, allowing it to be unlocked in addition to the existing keys. Additionally, it will bind this new key to PCRs 0 and 7, representing the system firmware and Secure Boot state. If there is only one TPM device on the system, you can use --tpm2-device=auto to automatically select the device. To confirm that the new key has been enrolled, you can dump the LUKS configuration and look for a systemd-tpm2 token entry, as well as an additional entry in the Keyslots section. To test the setup, you can use the /usr/lib/systemd/systemd-cryptsetup command. Additionally, you can check if the device is unsealed by using lsblk:
sudo /usr/lib/systemd/systemd-cryptsetup attach GPG_USB "/dev/sdb1" - tpm2-device=auto
lsblk
The lsblk command should display the unsealed and mounted device, like this:
NAME        MAJ:MIN RM   SIZE RO TYPE  MOUNTPOINTS
sda           8:0    0 223.6G  0 disk
 sda1        8:1    0   976M  0 part  /boot/efi
 sda2        8:2    0 222.6G  0 part
   root    254:0    0 222.6G  0 crypt /
sdb           8:16   1   7.5G  0 disk
 sdb1        8:17   1   7.5G  0 part
   GPG_USB 254:1    0   7.5G  0 crypt /media/vasudev/GPG_USB
Auto Mounting the device Now that we have solved the initial problem of unsealing the USB device using TPM2 instead of manually entering the key, the next step is to automatically mount the device upon insertion and remove the mapping when the device is removed. This can be achieved using the following udev rules:
ACTION=="add", KERNEL=="sd*", ENV DEVTYPE =="partition", ENV ID_BUS =="usb", ENV SYSTEMD_WANTS ="mount-gpg-usb@$env DEVNAME .service"
ACTION=="remove", KERNEL=="sd*", ENV DEVTYPE =="partition", ENV ID_BUS =="usb", RUN+="/usr/local/bin/umount_enc_usb.sh '%E ID_FS_UUID '"
When a device is added, a systemd service is triggered to mount the device at a specific location. Initially, I used a script with the RUN directive, but it resulted in an exit code of 32. This might be due to systemd-cryptsetup taking some time to return, causing udev to time out. To address this, I opted to use a systemd service instead. For device removal, even though the physical device is no longer present, the mapping may still remain, causing issues upon reinsertion. To resolve this, I created a script to close the luks mapping upon device removal. Below are the systemd service and script files: mount_enc_usb.sh:
#!/bin/bash
set -x
if [[ "$#" -ne 1 ]]; then
    echo "$(basename $0) <device>"
    exit 1
fi
device_uuid="$(blkid --output udev $1   grep ID_FS_UUID=   cut -d= -f2)"
if [[ "$device_uuid" == 000b2670-be4a-41b4-98eb-9adbd12a7616 ]]; then
    # Found our device, let's trigger systemd-cryptsetup
    /usr/lib/systemd/systemd-cryptsetup attach GPG_USB "$1" - tpm2-device=auto
    [[ -d /media/vasudev/GPG_USB ]]   (mkdir -p /media/vasudev/GPG_USB/ && chown vasudev:vasudev /media/vasudev/GPG_USB)
    mount /dev/mapper/GPG_USB /media/vasudev/GPG_USB
else
    echo "Not the interested device. Ignoring."
    exit 0
fi
umount_enc_usb.sh:
#!/bin/bash
if [[ "$#" -ne 1 ]]; then
  echo "$(basename $0) <fsuuid>"
  exit 1
fi
if [[ "$1" == "000b2670-be4a-41b4-98eb-9adbd12a7616" ]]; then
  # Our device is removed, let's close the luks mapping
  [[ -e /dev/mapper/GPG_USB ]] && cryptsetup luksClose /dev/mapper/GPG_USB
else
  echo "Not our device."
  exit 0
fi
mount-gpg-usb@.service:
[Unit]
Description=Mount the encrypted USB device service
[Service]
Type=simple
ExecStart=/usr/local/bin/mount_enc_usb.sh
With this setup, plugging in the USB device will automatically unseal and mount it, and upon removal, the luks mapping will be closed.

Note

This can be even done for LUKS2 encrypted root disk but will need some tweaking in initramfs.

29 June 2023

C.J. Collier: Converting a windows install to a libvirt VM

Reduce the size of your c: partition to the smallest it can be and then turn off windows with the understanding that you will never boot this system on the iron ever again.
Boot into a netinst installer image (no GUI). hold alt and press left arrow a few times until you get to a prompt to press enter. Press enter. In this example /dev/sda is your windows disk which contains the c: partition
and /dev/disk/by-id/usb0 is the USB-3 attached SATA controller that you have your SSD attached to (please find an example attached). This SSD should be equal to or larger than the windows disk for best compatability. A photo of a USB-3 attached SATA controller To find the literal path names of your detected drives you can run fdisk -l. Pay attention to the names of the partitions and the sizes of the drives to help determine which is which. Once you have a shell in the netinst installer, you should maybe be able to run a command like the following. This will duplicate the disk located at if (in file) to the disk located at of (out file) while showing progress as the status.
dd if=/dev/sda of=/dev/disk/by-id/usb0 status=progress
If you confirm that dd is available on the netinst image and the previous command runs successfully, test that your windows partition is visible in the new disk s partition table. The start block of the windows partition on each should match, as should the partition size.
fdisk -l /dev/disk/by-id/usb0
fdisk -l /dev/sda
If the output from the first is the same as the output from the second, then you are probably safe to proceed. Once you confirm that you have made and tested a full copy of the blocks from your windows drive saved on your usb disk, nuke your windows partition table from orbit.
dd if=/dev/zero of=/dev/sda bs=1M count=42
You can press alt-f1 to return to the Debian installer now. Follow the instructions to install Debian. Don t forget to remove all attached USB drives. Once you install Debian, press ctrl-alt-f3 to get a root shell. Add your user to the sudoers group:
# adduser cjac sudoers
log out
# exit
log in as your user and confirm that you have sudo
$ sudo ls
Don t forget to read the spider man advice enter your password you ll need to install virt-manager. I think this should help:
$ sudo apt-get install virt-manager libvirt-daemon-driver-qemu qemu-system-x86
insert the USB drive. You can now create a qcow2 file for your virtual machine.
$ sudo qemu-img convert -O qcow2 \
/dev/disk/by-id/usb0 \
/var/lib/libvirt/images/windows.qcow2
I personally create a volume group called /dev/vg00 for the stuff I want to run raw and instead of converting to qcow2 like all of the other users do, I instead write it to a new logical volume.
sudo lvcreate /dev/vg00 -n windows -L 42G # or however large your drive was
sudo dd if=/dev/disk/by-id/usb0 of=/dev/vg00/windows status=progress
Now that you ve got the qcow2 file created, press alt-left until you return to your GDM session. The apt-get install command above installed virt-manager, so log in to your system if you haven t already and open up gnome-terminal by pressing the windows key or moving your mouse/gesture to the top left of your screen. Type in gnome-terminal and either press enter or click/tap on the icon. I like to run this full screen so that I feel like I m in a space ship. If you like to feel like you re in a spaceship, too, press F11. You can start virt-manager from this shell or you can press the windows key and type in virt-manager and press enter. You ll want the shell to run commands such as virsh console windows or virsh list When virt-manager starts, right click on QEMU/KVM and select New.
In the New VM window, select Import existing disk image
When prompted for the path to the image, use the one we created with sudo qemu-img convert above.
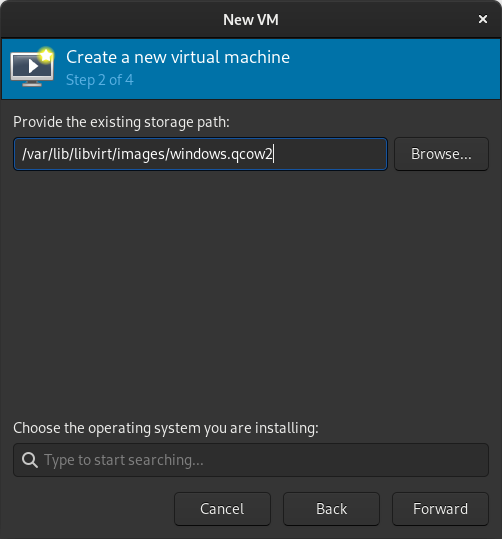
Select the version of Windows you want.
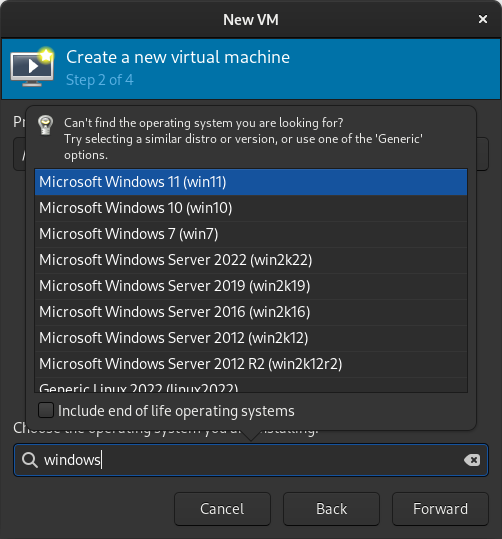
Select memory and CPUs to allocate to the VM.
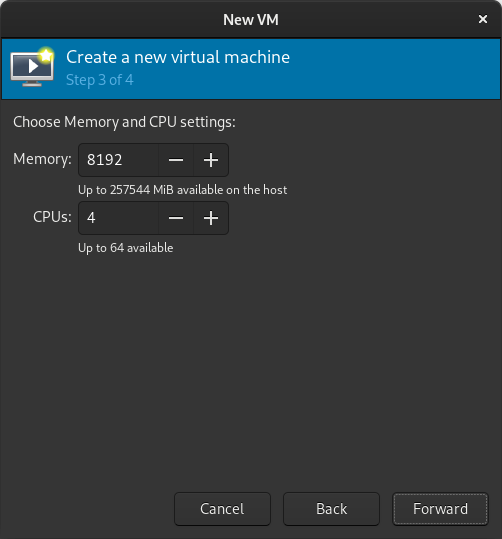
Tick the Customize configuration before install box
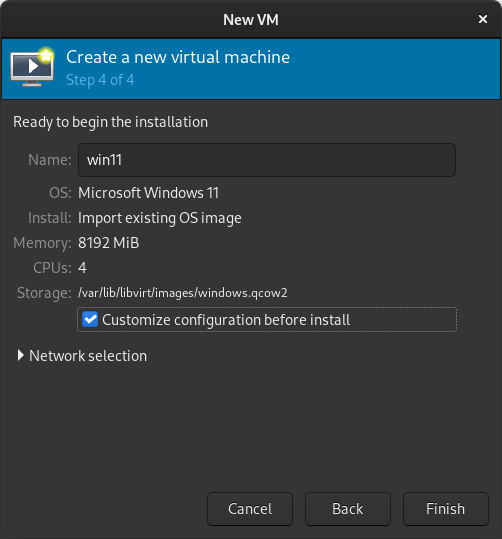
If you re prompted to enable the default network, do so now.
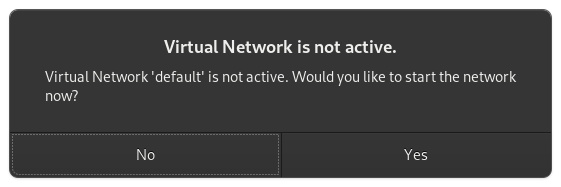
The default hardware layout should probably suffice. Get it as close to the underlying hardware as it is convenient to do. But Windows is pretty lenient these days about virtualizing licensed windows instances so long as they re not running in more than one place at a time. Good luck! Leave comments if you have questions.

27 June 2023

Wouter Verhelst: The future of the eID on RHEL

Since before I got involved in the eID back in 2014, we have provided official packages of the eID for Red Hat Enterprise Linux. Since RHEL itself requires a license, we did this, first, by using buildbot and mock on a Fedora VM to set up a CentOS chroot in which to build the RPM package. Later this was migrated to using GitLab CI and to using docker rather than VMs, in an effort to save some resources. Even later still, when Red Hat made CentOS no longer be a downstream of RHEL, we migrated from building in a CentOS chroot to building in a Rocky chroot, so that we could continue providing RHEL-compatible packages. Now, as it seems that Red Hat is determined to make that impossible too, I investigated switching to actually building inside a RHEL chroot rather than a derivative one. Let's just say that might be a challenge...
[root@b09b7eb7821d ~]# mock --dnf --isolation=simple --verbose -r rhel-9-x86_64 --rebuild eid-mw-5.1.11-0.v5.1.11.fc38.src.rpm --resultdir /root --define "revision v5.1.11"
ERROR: /etc/pki/entitlement is not a directory is subscription-manager installed?
Okay, so let's fix that.
[root@b09b7eb7821d ~]# dnf install -y subscription-manager
(...)
Complete!
[root@b09b7eb7821d ~]# mock --dnf --isolation=simple --verbose -r rhel-9-x86_64 --rebuild eid-mw-5.1.11-0.v5.1.11.fc38.src.rpm --resultdir /root --define "revision v5.1.11"
ERROR: No key found in /etc/pki/entitlement directory.  It means this machine is not subscribed.  Please use 
  1. subscription-manager register
  2. subscription-manager list --all --available (available pool IDs)
  3. subscription-manager attach --pool <POOL_ID>
If you don't have Red Hat subscription yet, consider getting subscription:
  https://access.redhat.com/solutions/253273
You can have a free developer subscription:
  https://developers.redhat.com/faq/
Okay... let's fix that too, then.
[root@b09b7eb7821d ~]# subscription-manager register
subscription-manager is disabled when running inside a container. Please refer to your host system for subscription management.
Wut.
[root@b09b7eb7821d ~]# exit
wouter@pc220518:~$ apt-cache search subscription-manager
wouter@pc220518:~$
As I thought, yes. Having to reinstall the docker host machine with Fedora just so I can build Red Hat chroots seems like a somewhat excessive requirement, which I don't think we'll be doing that any time soon. We'll see what the future brings, I guess.

Matt Brown: Designing a PCBA friendly CO2 monitor

co2mon.nz currently uses monitors based on Oliver Seiler s open source design which I am personally building. This post describes my exploration of how to achieve production of a CO2 monitor that could enable the growth of co2mon.nz.

Goals Primarily I want to design a CO2 monitor which allows the majority of the production process to be outsourced. In particular, the PCB should be able to be assembled in an automated fashion (PCBA). As a secondary goal, I d like to improve the aesthetics of the monitor while retaining the unique feature of displaying clear visual indication of the current ventilation level through coloured lights. Overall, I ll consider the project successfull if I can achieve a visually attractive CO2 monitor which takes me less than 10 minutes per monitor to assemble/box/ship and whose production cost has the potential to be lower than the current model.

PCB

Schematic The existing CO2 monitor design provides a solid foundation but relies upon the ESP32 Devkit board, which is intended for evaluation purposes and is not well suited to automated assembly. Replacing this devkit board with the underlying ESP32 module is the major change needed to enable PCBA production, which then also requires moving the supporting electronics from the devkit board directly onto the primary PCB. The basic ESP32 chipset used in the devkit boards is no longer available as a discrete module suitable for placement directly onto a PCB which means the board will also have to be updated to use a more modern variant of the ESP32 chipset which is in active production such as the ESP32-S3. The ESP32-S3-WROOM1-N4 module is a very close match to the original devkit and will be suitable for this project. In addition to the change of ESP module, I made the following other changes to the components in use:
  • Added an additional temperature/humidity sensor (SHT30). The current monitors take temperature/humidity measurements from the SCD40 chipset. These are primarily intended to help in the calculation of CO2 levels and rely on an offset being subtracted to account for the heat generated by the electronic components themselves. I ve found their accuracy to OK, but not perfect. SHT30 is a cheap part, so its addition to hopefully provide improved temperature/humidity measurement is an easy choice.
  • Swapped to USB-C instead of USB-B for the power connector. USB-C is much more common than USB-B and is also smaller and not as tall off the board which provides more flexibility in the case design.
With major components selected the key task is to draw the schematic diagram describing how they electrically connect to each other, which includes all the supporting electronics (e.g. resistors, capacitors, etc) needed. Schematic I started out trying to use the EasyEDA/OSHWLab ecosystem thinking the tight integration with JLCPCB s assembly services would be a benefit, but the web interface was too clunky and limiting and I quickly got frustrated. KiCad proved to be a much more pleasant and capable tool for the job. The reference design in the ESP32 datasheet (p28) and USB-C power supply examples from blnlabs were particularly helpful alongside the KiCad documentation and the example of the existing monitor in completing this step (click the image to enlarge).

Layout The next step is to physically lay out where each component from the schematic will sit on the PCB itself. Obviously this requires first determining the overall size, shape and outline of the board and needs to occur in iteration with the intended design of the overall monitor, including the case, to ensure components like switches and USB sockets line up correctly. In addition to the requirements around the look and function of the case, the components themselves also have considerations that must be taken into account, including:
  • For best WiFi reception, the ESP32 antenna should be at the top of the monitor and should not have PCB underneath it, or for a specified distance either side of it.
  • The SHT30 temperature sensor should be as far from any heat generating components (e.g. the ESP32, BME680 and SCD40 modules) as possible and also considering that any generated heat will rise, as low on the monitor as possible.
  • The sensors measuring the air (SCD40, BME680 and SHT30) must have good exposure to the air outside the case.
PCB Taking all of these factors into account I ended up with a square PCB containing a cutout in the top right so that the ESP32 antenna can sit within the overall square outline while still meeting its design requirements. The SCD40 and BME680 sit in the top left corner, near the edges for good airflow and far away from the SHT30 temperature sensor in the bottom left corner. The LEDs I placed in a horizontal row across the center of the board, the LCD in the bottom right, a push button on the right-hand side and the USB-C socket in the center at the bottom. Once the components are placed, the next big task is to route the traces (aka wires) between the components on the board such that all the required electrical connections are made without any unintended connections (aka shorts) being created. This is a fun constraint solving/optimisation challenge and takes on an almost artistic aspect with other PCB designers often having strong opinions on which layout is best. The majority of the traces and routing for this board were able to be placed on the top layer of the PCB, but I also made use of the back layer for a few traces to help avoid conflicts and deal with places where different traces needed to cross each other. It s easy to see how this step would be much more challenging and time consuming on a larger and more complex PCB design. The final touches were to add some debugging breakouts for the serial and JTAG ports on the ESP32-S3 and a logo and various other helpful text on the silkscreen layer that will be printed on the PCB so it looks nice.

Production For assembly of the PCB, I went with JLCPCB based out of China. The trickiest part of the process was component selection and ensuring that the parts I had planned in the schematic were available. JLCPCB in conjunction with lcsc.com provides a basic and extended part library. If you use only basic parts you get quicker and cheaper assembly, while using extended parts bumps your order into a longer process with a small fee charged for each component on the board. Initially I spent a lot of time selecting components (particularly LEDs and switches) that were in the basic library before realising that the ESP32 modules are only available in the extended library! I think the lesson is that unless you re building the most trivial PCB with only passive components you will almost certainly end up in the advanced assembly process anyway, so trying to stay within the basic parts library is not worth the time. Unfortunately the SCD40 sensor, the most crucial part of the monitor, is not stocked at all by JLCPCB/LCSC! To work around this JLCPCB will maintain a personal component library for you when you ship components to them to for use in future orders. Given the extra logistical time and hassle of having to do this, combined with having a number of SCD40 components already on hand I decided to have the boards assembled without this component populated for the initial prototype run. This also had the benefit of lowering the risk if something went wrong as the cost of the SCD40 is greater than the cost of the PCB and all the other components combined! I found the kicad-jlcpcb-tools plugin for KiCad invaluable for keeping track of what part from lcsc.com I was planning to use for each component and generating the necessary output files for JLCPCB. The plugin allows you to store these mappings in your actual schematic which is very handy. The search interface it provides is fairly clunky and I found it was often easier to search for the part I needed on lcsc.com and then just copy the part number across into the plugin s search box rather than trying to search by name or component type. The LCD screen is the remaining component which is not easily assembled onto the PCB directly, but as you ll see next, this actually turned out to be OK as integrating the screen directly into the case makes the final assembly process smoother. fabricated PCBs The final surprise in the assembly process was the concept of edge rails, additional PCB material that is needed on either side of the board to help with feeding it through the assembly machine in the correct position. These can be added automatically by JLCPCB and have to be snapped off after the completed boards are received. I hadn t heard about these before and I was a little worried that they d interfere or get in the way of either the antenna cut-out at the top of the board, or the switch on the right hand side as it overhangs the edge so it can sit flush with the case. In the end there was no issue with the edge rails. The switch was placed hanging over them without issue and snapping them off once the boards arrived was a trivial 30s job using a vice to hold the edge rail and then gently tipping the board over until it snapped off - the interface between the board and the rails while solid looking has obviously been scored or perforated in some way during the production process so the edge breaks cleanly and smoothly. Magic! The process was amazingly quick with the completed PCBs (picture above) arriving within 7 days of the order being placed and looking amazing.

Case

Design I mocked up a very simple prototype of the case in FreeCAD during the PCB design process to help position and align the placement of the screen, switch and USB socket on the PCB as all three of these components interface directly with the edges of the case. Initially this design was similar to the current monitor design where the PCB (with lights and screen attached) sits in the bottom of the case, which has walls containing grilles for airflow and then a separate transparent perspex is screwed onto the top to complete the enclosure. As part of the aesthetic improvements for the new monitor I wanted to move away from a transparent front panel to something opaque but still translucent enough to allow the colour of the lights to show through. Without a transparent front panel the LCD also needs to be mounted directly into the case itself. The first few prototype iterations followed the design of the original CO2 monitor with a flat front panel that attaches to the rest of the case containing the PCB, but the new requirement to also attach the LCD to the front panel proved to make this unworkable. To stay in place the LCD has to be pushed onto mounting poles containing a catch mechanism which requires a moderate amount of force and applying that force to the LCD board when it is already connected to the PCB is essentially impossible. case with lcd attached As a result I ended up completely flipping the design such that the front panel is a single piece of plastic that also encompasses the walls of the case and contains appropriate mounting stakes for both the screen and the main PCB. Getting to this design hugely simplified the assembly process. Starting with an empty case lying face down on a bench, the LCD screen is pushed onto the mounting poles and sits flush with the cover of the case - easily achieved without the main PCB yet in place. case with pcb in place Next, the main PCB is gently lowered into the case facing downwards and sits on the mounting pole in each corner with the pins for the LCD just protruding through the appropriate holes in the PCB ready to be quickly soldered into place (this took significant iteration and tuning of dimensions/positioning to achieve!). Finally, a back panel can be attached which holds the PCB in place and uses cantilever snap joints to click on to the rest of the case. Overall the design is a huge improvement over the previous case which required screws and spacers to position the PCB and cover relative to the rest of the case, with the spacers and screws being particularly fiddly to work with. The major concern I had with the new design was that the mount to attach the monitor to the wall has moved from being attached to the main case and components directly to needing to be on the removable back panel - if the clips holding this panel to the case fail the core part of the monitor will fall off the wall which would not be good. To guard against this I ve doubled the size and number of clips at the top of the case (which bears the weight) and the result seems very robust in my testing. To completely assemble a monitor, including the soldering step takes me about 2-3 minutes individually, and would be even quicker if working in batches.

Production Given the number of design/testing iterations required to fine tune the case I chose not to outsource case production for now and used my 3D printer to produce them. I ve successfully used JLCPCB s 3D printing service for the previous case design, so I m confident that getting sufficient cases printed from JLCPCB or another supplier will not be an issue now that the design is finalised. completed monitor I tried a variety of filament colours, but settled on a transparent filament which once combined in the necessary layers to form the case is not actually transparent like perspex is, but provides a nice translucent medium which achieves the goal of having the light colour visible without exposing all of the circuit board detail. There s room for future improvement in the positioning of the LEDs on the circuit board to provide a more even distribution of light across the case but overall I really like the way the completed monitor ends up looking.

Evaluation Building this monitor has been a really fun project, both in seeing something progress from an idea, to plans on a screen to a nice physical thing on my wall, but also in learning and developing a bunch of new skills in PCB design, assembly and 3D design. completed monitor The goal of having a CO2 monitor which I can outsource the vast majority of production of is as close to being met as I think is possible without undertaking the final proof of placing a large order. I ve satisfied myself that each step is feasible and that the final assembly process is quick, easy and well below the level of effort and time it was taking me to produce the original monitors. Cost wise it s also a huge win, primarily in terms of the time taken, but also in the raw components - currently the five prototypes I ordered and built are on par with the component cost of the original CO2 monitor, but this will drop further with larger orders due to price breaks and amortisation of the setup and shipping expenses across more monitors. This project has also given me a much better appreciation for how much I m only just scratching the surface of the potential complexities and challenges in producing a hardware product of this type. I m reasonably confident I could successfully produce a few hundred and maybe even a few thousand monitors using this approach, but it s also clear that getting beyond that point is and would be a whole further level of effort and learning. Hardware is hard work. That s not news to anyone, including me, but there is something to be said for experiencing the process first hand to make the reality of what s required real. The PCB and case designs are both shared and can be found at https://github.com/co2monnz/co2monitor-pcb and https://github.com/co2monnz/cad, feedback and suggestions welcome!

17 June 2023

John Goerzen: Using dar for Data Archiving

This is the third post in a series about data archiving to removable media (optical discs and hard drives). In the first, I explained the difference between backing up and archiving, established goals for the project, and said I d evaluate git-annex and dar. The second post evaluated git-annex, and now it s time to look at dar. The series will conclude with a post comparing git-annex with dar. What is dar? I could open with the same thing I did with git-annex, just changing the name of the program: [dar] is a fantastic and versatile program that does well, it s one of those things that can do so much that it s a bit hard to describe. It is, fundamentally, an archiver like tar or zip (makes one file representing a bunch of other files), but it goes far beyond that. dar s homepage lays out a comprehensive list of features, which I will try to summarize here. So to tie this together for this project, I will set up a 400MB slice size (to mimic what I did with git-annex), and see how dar saves the data and restores it. Isolated cataloges aren t strictly necessary for this, but by using them (and/or dar_manager), we can build up a database of files and locations and thus directly compare dar to git-annex location tracking. Walkthrough: Creating the first archive As with the git-annex walkthrough, I ll set some variables to make it easy to remember: OK, we can run the backup immediately. No special setup is needed. dar supports both short-form (single-character) parameters and long-form ones. Since the parameters probably aren t familiar to everyone, I will use the long-form ones in these examples. Here s how we create our initial full backup. I ll explain the parameters below:
$ dar \
--verbose \
--create $DRIVE/bak1 \
--on-fly-isolate $CATDIR/bak1 \
--slice 400M \
--min-digits 2 \
--pause \
--fs-root $SOURCEDIR
Let s look at each of these parameters: This same command could have been written with short options as:
$ dar -v -c $DRIVE/bak1 -@ $CATDIR/bak1 -s 400M -9 2 -p -R $SOURCEDIR
What does it look like while running? Here s an excerpt:
...
Adding file to archive: /acrypt/no-backup/jgoerzen/testdata/[redacted]
Finished writing to file 1, ready to continue ? [return = YES Esc = NO]
...
Writing down archive contents...
Closing the escape layer...
Writing down the first archive terminator...
Writing down archive trailer...
Writing down the second archive terminator...
Closing archive low layer...
Archive is closed.
--------------------------------------------
581 inode(s) saved
including 0 hard link(s) treated
0 inode(s) changed at the moment of the backup and could not be saved properly
0 byte(s) have been wasted in the archive to resave changing files
0 inode(s) with only metadata changed
0 inode(s) not saved (no inode/file change)
0 inode(s) failed to be saved (filesystem error)
0 inode(s) ignored (excluded by filters)
0 inode(s) recorded as deleted from reference backup
--------------------------------------------
Total number of inode(s) considered: 581
--------------------------------------------
EA saved for 0 inode(s)
FSA saved for 581 inode(s)
--------------------------------------------
Making room in memory (releasing memory used by archive of reference)...
Now performing on-fly isolation...
...
That was easy! Let s look at the contents of the backup directory:
$ ls -lh $DRIVE
total 3.7G
-rw-r--r-- 1 jgoerzen jgoerzen 400M Jun 16 19:27 bak1.01.dar
-rw-r--r-- 1 jgoerzen jgoerzen 400M Jun 16 19:27 bak1.02.dar
-rw-r--r-- 1 jgoerzen jgoerzen 400M Jun 16 19:27 bak1.03.dar
-rw-r--r-- 1 jgoerzen jgoerzen 400M Jun 16 19:27 bak1.04.dar
-rw-r--r-- 1 jgoerzen jgoerzen 400M Jun 16 19:28 bak1.05.dar
-rw-r--r-- 1 jgoerzen jgoerzen 400M Jun 16 19:28 bak1.06.dar
-rw-r--r-- 1 jgoerzen jgoerzen 400M Jun 16 19:28 bak1.07.dar
-rw-r--r-- 1 jgoerzen jgoerzen 400M Jun 16 19:28 bak1.08.dar
-rw-r--r-- 1 jgoerzen jgoerzen 400M Jun 16 19:29 bak1.09.dar
-rw-r--r-- 1 jgoerzen jgoerzen 156M Jun 16 19:33 bak1.10.dar
And the isolated catalog:
$ ls -lh $CATDIR
total 37K
-rw-r--r-- 1 jgoerzen jgoerzen 35K Jun 16 19:33 bak1.1.dar
The isolated catalog is stored compressed automatically. Well this was easy. With one command, we archived the entire data set, split into 400MB chunks, and wrote out the catalog data. Walkthrough: Inspecting the saved archive Can dar tell us which slice contains a given file? Sure:
$ dar --list $DRIVE/bak1 --list-format=slicing less
Slice(s) [Data ][D][ EA ][FSA][Compr][S] Permission Filemane
--------+--------------------------------+----------+-----------------------------
...
1 [Saved][ ] [-L-][ 0%][X] -rwxr--r-- [redacted]
1-2 [Saved][ ] [-L-][ 0%][X] -rwxr--r-- [redacted]
2 [Saved][ ] [-L-][ 0%][X] -rwxr--r-- [redacted]
...
This illustrates the transition from slice 1 to slice 2. The first file was stored entirely in slice 1; the second stored partially in slice 1 and partially in slice 2, and third solely in slice 2. We can get other kinds of information as well.
$ dar --list $DRIVE/bak1 less
[Data ][D][ EA ][FSA][Compr][S] Permission User Group Size Date filename
--------------------------------+------------+-------+-------+---------+-------------------------------+------------
[Saved][ ] [-L-][ 0%][X] -rwxr--r-- jgoerzen jgoerzen 24 Mio Mon Mar 5 07:58:09 2018 [redacted]
[Saved][ ] [-L-][ 0%][X] -rwxr--r-- jgoerzen jgoerzen 16 Mio Mon Mar 5 07:58:09 2018 [redacted]
[Saved][ ] [-L-][ 0%][X] -rwxr--r-- jgoerzen jgoerzen 22 Mio Mon Mar 5 07:58:09 2018 [redacted]
These are the same files I was looking at before. Here we see they are 24MB, 16MB, and 22MB in size, and some additional metadata. Even more is available in the XML list format. Walkthrough: updates As with git-annex, I ve made some changes in the source directory: moved a file, added another, and deleted one. Let s create an incremental backup now:
$ dar \
--verbose \
--create $DRIVE/bak2 \
--on-fly-isolate $CATDIR/bak2 \
--ref $CATDIR/bak1 \
--slice 400M \
--min-digits 2 \
--pause \
--fs-root $SOURCEDIR
This command is very similar to the earlier one. Instead of writing an archive and catalog named bak1, we write one named bak2. What s new here is --ref $CATDIR/bak1. That says, make an incremental based on an archive of reference. All that is needed from that archive of reference is the detached catalog. --ref $DRIVE/bak1 would have worked equally well here. Here s what I did to the $SOURCEDIR: Let s see if dar s command output matches this:
...
Adding file to archive: /acrypt/no-backup/jgoerzen/testdata/file01-unchanged
Saving Filesystem Specific Attributes for /acrypt/no-backup/jgoerzen/testdata/file01-unchanged
Adding file to archive: /acrypt/no-backup/jgoerzen/testdata/cp
Saving Filesystem Specific Attributes for /acrypt/no-backup/jgoerzen/testdata/cp
Adding folder to archive: [redacted]
Saving Filesystem Specific Attributes for [redacted]
Adding reference to files that have been destroyed since reference backup...
...
--------------------------------------------
3 inode(s) saved
including 0 hard link(s) treated
0 inode(s) changed at the moment of the backup and could not be saved properly
0 byte(s) have been wasted in the archive to resave changing files
0 inode(s) with only metadata changed
578 inode(s) not saved (no inode/file change)
0 inode(s) failed to be saved (filesystem error)
0 inode(s) ignored (excluded by filters)
2 inode(s) recorded as deleted from reference backup
--------------------------------------------
Total number of inode(s) considered: 583
--------------------------------------------
EA saved for 0 inode(s)
FSA saved for 3 inode(s)
--------------------------------------------
...
Yes, it does. The rename is recorded as a deletion and an addition, since dar doesn t directly track renames. So the rename plus the deletion account for the two deletions. The rename plus the addition of cp count as 2 of the 3 inodes saved; the third is the modified directory from which files were deleted and moved out. Let s see the files that were created:
$ ls -lh $DRIVE/bak2*
-rw-r--r-- 1 jgoerzen jgoerzen 18M Jun 16 19:52 /acrypt/no-backup/jgoerzen/dar-testing/drive/bak2.01.dar
$ ls -lh $CATDIR/bak2*
-rw-r--r-- 1 jgoerzen jgoerzen 22K Jun 16 19:52 /acrypt/no-backup/jgoerzen/dar-testing/cat/bak2.1.dar
What does list look like now?
Slice(s) [Data ][D][ EA ][FSA][Compr][S] Permission Filemane
--------+--------------------------------+----------+-----------------------------
[ ][ ] [---][-----][X] -rwxr--r-- [redacted]
1 [Saved][ ] [-L-][ 0%][X] -rwxr--r-- file01-unchanged
...
[--- REMOVED ENTRY ----][redacted]
[--- REMOVED ENTRY ----][redacted]
Here I show an example of:
  1. A file that was not changed from the initial backup. Its presence was simply noted, but because we re doing an incremental, the data wasn t saved.
  2. A file that is saved in this incremental, on slice 1.
  3. The two deleted files
Walkthrough: dar_manager As we ve seen above, the two archives (or their detached catalog) give us a complete picture of what files were present at the time of the creation of each archive, and what files were stored in a given archive. We can certainly continue working in that way. We can also use dar_manager to build a comprehensive database of these archives, to be able to find what media is necessary to restore each given file. Or, with dar_manager s when parameter, we can restore files as of a particular date. Let s try it out. First, we create our database:
$ dar_manager --create $DARDB
$ dar_manager --base $DARDB --add $DRIVE/bak1
Auto detecting min-digits to be 2
$ dar_manager --base $DARDB --add $DRIVE/bak2
Auto detecting min-digits to be 2
Here we created the database, and added our two catalogs to it. (Again, we could have as easily used $CATDIR/bak1; either the archive or its isolated catalog will work here.) It s important to add the catalogs in order. Let s do some quick experimentation with dar_manager:
$ dar_manager -v --base $DARDB --list
Decompressing and loading database to memory...
dar path :
dar options :
database version : 6
compression used : gzip
compression level: 9 archive # path basename
------------+--------------+---------------
1 /acrypt/no-backup/jgoerzen/dar-testing/drive bak1
2 /acrypt/no-backup/jgoerzen/dar-testing/drive bak2
$ dar_manager --base $DARDB --stat
archive # most recent/total data most recent/total EA
--------------+-------------------------+-----------------------
1 580/581 0/0
2 3/3 0/0
The list option shows the correlation between dar_manager archive number (1, 2) with filenames (bak1, bak2). It is coincidence here that 1/bak1 and 2/bak2 correlate; that s not necessarily the case. Most dar_manager commands operate on archive number, while dar commands operate on archive path/basename. Now let s see just what files are saved in archive , the incremental:
$ dar_manager --base $DARDB --used 2
[ Saved ][ ] [redacted]
[ Saved ][ ] file01-unchanged
[ Saved ][ ] cp
Now we can also where a file is stored. Here s one that was saved in the full backup and unmodified in the incremental:
$ dar_manager --base $DARDB --file [redacted]
1 Fri Jun 16 19:15:12 2023 saved absent
2 Fri Jun 16 19:15:12 2023 present absent
(The absent at the end refers to extended attributes that the file didn t have) Similarly, for files that were added or removed, they ll be listed only at the appropriate place. Walkthrough: Restoration I m not going to repeat the author s full restoration with dar page, but here are some quick examples. A simple way of doing everything is using incrementals for the whole series. To do that, you d have bak1 be full, bak2 based on bak1, bak3 based on bak2, bak4 based on bak3, etc. To restore from such a series, you have two options: If you get fancy for instance, bak2 is based on bak1, bak3 on bak2, bak4 on bak1 then you would want to use dar_manager to ensure a consistent restore is completed. Either way, the process is nearly identical. Also, I figure, to make things easy, you can save a copy of the entire set of isolated catalogs before you finalize each disc/drive. They re so small, and this would let someone with just the most recent disc build a dar_manager database without having to go through all the other discs. Anyhow, let s do a restore using just dar. I ll make a $RESTOREDIR and do it that way.
$ dar \
--verbose \
--extract $DRIVE/bak1 \
--fs-root $RESTOREDIR \
--no-warn \
--execute "echo Ready for slice %n. Press Enter; read foo"
This execute lets us see how dar works; this is an illustration of the power it has (above pause); it s a snippet interpreted by /bin/sh with %n being one of the dar placeholders. If memory serves, it s not strictly necessary, as dar will prompt you for slices it needs if they re not mounted. Anyhow, you ll see it first reading the last slice, which contains the catalog, then reading from the beginning. Here we go:
Auto detecting min-digits to be 2
Opening archive bak1 ...
Opening the archive using the multi-slice abstraction layer...
Ready for slice 10. Press Enter
...
Loading catalogue into memory...
Locating archive contents...
Reading archive contents...
File ownership will not be restored du to the lack of privilege, you can disable this message by asking not to restore file ownership [return = YES Esc = NO]
Continuing...
Restoring file's data: [redacted]
Restoring file's FSA: [redacted]
Ready for slice 1. Press Enter
...
Ready for slice 2. Press Enter
...
--------------------------------------------
581 inode(s) restored
including 0 hard link(s)
0 inode(s) not restored (not saved in archive)
0 inode(s) not restored (overwriting policy decision)
0 inode(s) ignored (excluded by filters)
0 inode(s) failed to restore (filesystem error)
0 inode(s) deleted
--------------------------------------------
Total number of inode(s) considered: 581
--------------------------------------------
EA restored for 0 inode(s)
FSA restored for 0 inode(s)
--------------------------------------------
The warning is because I m not doing the extraction as root, which limits dar s ability to fully restore ownership data. OK, now the incremental:
$ dar \
--verbose \
--extract $DRIVE/bak2 \
--fs-root $RESTOREDIR \
--no-warn \
--execute "echo Ready for slice %n. Press Enter; read foo"
...
Ready for slice 1. Press Enter
...
Restoring file's data: /acrypt/no-backup/jgoerzen/dar-testing/restore/file01-unchanged
Restoring file's FSA: /acrypt/no-backup/jgoerzen/dar-testing/restore/file01-unchanged
Restoring file's data: /acrypt/no-backup/jgoerzen/dar-testing/restore/cp
Restoring file's FSA: /acrypt/no-backup/jgoerzen/dar-testing/restore/cp
Restoring file's data: /acrypt/no-backup/jgoerzen/dar-testing/restore/[redacted directory]
Removing file (reason is file recorded as removed in archive): [redacted file]
This all looks right! Now how about we compare the restore to the original source directory?
$ diff -durN $SOURCEDIR $RESTOREDIR
No changes perfect. We could instead do this restore via a single dar_manager command, though annoyingly, we d have to pass all top-level files/directories to dar_manager restore. But still, it s one command, and basically automates and optimizes the dar restores shown above. Conclusions Dar makes it extremely easy to just Do The Right Thing when making archives. One command makes a backup. It saves things in simple files. You can make an isolated catalog if you want, and it too is saved in a simple file. You can query what is in the files and where. You can restore from all or part of the files. You can simply play the backups forward, in order, to achieve a full and consistent restore. Or you can load data about them into dar_manager for an optimized restore. A bit of scripting will be necessary to make incrementals; finding the most recent backup or catalog. If backup files are named with care for instance, by date then this should be a pretty easy task. I haven t touched on resiliency yet. dar comes with tools for recovering archives that have had portions corrupted or lost. It can also rebuild the catalog if it is corrupted or lost. It adds tape marks (or escape sequences ) to the archive along with the data stream. So every entry in the catalog is actually stored in the archive twice: once alongside the file data, and once at the end in the collected catalog. This allows dar to scan a corrupted file for the tape marks and reconstruct whatever is still intact, even if the catalog is lost. dar also integrates with tools like sha256sum and par2 to simplify archive integrity testing and restoration. This balances against the need to use a tool (dar, optionally with a GUI frontend) to restore files. I ll discuss that more in the next post.

15 June 2023

Jonathan Dowland: containers as first-class network citizens

I've moved to having containers be first-class citizens on my home network, so any local machine (laptop, phone,tablet) can communicate directly with them all, but they're not (by default) exposed to the wider Internet. Here's why, and how. After I moved containers from docker to Podman and systemd, it became much more convenient to run web apps on my home server, but the default approach to networking (each container gets an address on a private network between the host server and containers) meant tedious work (maintaining and reconfiguring a HTTP reverse proxy) to make them reachable by other devices. A more attractive arrangement would be if each container received an IP from the range used by my home LAN, and were automatically addressable from any device on it. To make the containers first-class citizens on my home LAN, first I needed to configure a Linux network bridge and attach the host machine's interface to it (I've done that many times before); then define a new Podman network, of type "bridge". podman-network-create (1) serves as reference, but the blog post Exposing Podman containers fully on the network is an easier read (skip past the macvlan bit). I've opted to choose IP addresses for each container by hand. The Podman network is narrowly defined to a range of IPs that are within the subnet that my ISP-provided router uses, but outside the range of IPs that it allocates. When I start up a container by hand for the first time, I choose a free IP from the sub-range by hand and add a line to /etc/avahi/hosts on the parent machine, e.g.
192.168.1.33 octoprint.local
I then start the container specifying that address, e.g.
podman run --rm -d --name octoprint \
        ...
        --network bridge_local --ip 192.168.1.33 \
        octoprint/octoprint
I can now access that container from any device in my house (laptop, phone, tablet...) via octoprint.local. What's next Although it's not a huge burden, it would be nice to not need to statically define the addresses in /etc/avahi/hosts (perhaps via "IPAM"). I've also been looking at WireGuard (which should be the subject of a future blog post) and combining this with that would be worthwhile.

30 May 2023

Russ Allbery: Review: The Mimicking of Known Successes

Review: The Mimicking of Known Successes, by Malka Older
Series: Mossa and Pleiti #1
Publisher: Tordotcom
Copyright: 2023
ISBN: 1-250-86051-2
Format: Kindle
Pages: 169
The Mimicking of Known Successes is a science fiction mystery novella, the first of an expected series. (The second novella is scheduled to be published in February of 2024.) Mossa is an Investigator, called in after a man disappears from the eastward platform on the 4 63' line. It's an isolated platform, five hours away from Mossa's base, and home to only four residential buildings and a pub. The most likely explanation is that the man jumped, but his behavior before he disappeared doesn't seem consistent with that theory. He was bragging about being from Valdegeld University, talking to anyone who would listen about the important work he was doing not typically the behavior of someone who is suicidal. Valdegeld is the obvious next stop in the investigation. Pleiti is a Classics scholar at Valdegeld. She is also Mossa's ex-girlfriend, making her both an obvious and a fraught person to ask for investigative help. Mossa is the last person she expected to be waiting for her on the railcar platform when she returns from a trip to visit her parents. The Mimicking of Known Successes is mostly a mystery, following Mossa's attempts to untangle the story of what happened to the disappeared man, but as you might have guessed there's a substantial sapphic romance subplot. It's also at least adjacent to Sherlock Holmes: Mossa is brilliant, observant, somewhat monomaniacal, and very bad at human relationships. All of this story except for the prologue is told from Pleiti's perspective as she plays a bit of a Watson role, finding Mossa unreadable, attractive, frustrating, and charming in turn. Following more recent Holmes adaptations, Mossa is portrayed as probably neurodivergent, although the story doesn't attach any specific labels. I have no strong opinions about this novella. It was fine? There's a mystery with a few twists, there's a sapphic romance of the second chance variety, there's a bit of action and a bit of hurt/comfort after the action, and it all felt comfortably entertaining but kind of predictable. Susan Stepney has a "passes the time" review rating, and while that may be a bit harsh, that's about where I ended up. The most interesting part of the story is the science fiction setting. We're some indefinite period into the future. Humans have completely messed up Earth to the point of making it uninhabitable. We then took a shot at terraforming Mars and messed that planet up to the point of uninhabitability as well. Now, what's left of humanity (maybe not all of it the story isn't clear) lives on platforms connected by rail lines high in the atmosphere of Jupiter. (Everyone in the story calls Jupiter "Giant" for reasons that I didn't follow, given that they didn't rename any of its moons.) Pleiti's position as a Classics scholar means that she studies Earth and its now-lost ecosystems, whereas the Modern faculty focus on their new platform life. This background does become relevant to the mystery, although exactly how is not clear at the start. I wouldn't call this a very realistic setting. One has to accept that people are living on platforms attached to artificial rings around the solar system's largest planet and walk around in shirt sleeves and only minor technological support due to "atmoshields" of some unspecified capability, and where the native atmosphere plays the role of London fog. Everything feels vaguely Edwardian, including to the occasional human porter and message runner, which matches the story concept but seems unlikely as a plausible future culture. I also disbelieve in humanity's ability to do anything to Earth that would make it less inhabitable than the clouds of Jupiter. That said, the setting is a lot of fun, which is probably more important. It's fun to try to visualize, and it has that slightly off-balance, occasionally surprising feel of science fiction settings where everyone is recognizably human but the things they consider routine and unremarkable are unexpected by the reader. This novella also has a great title. The Mimicking of Known Successes is simultaneously a reference a specific plot point from late in the story, a nod to the shape of the romance, and an acknowledgment of the Holmes pastiche, and all of those references work even better once you know what the plot point is. That was nicely done. This was not very memorable apart from the setting, but it was pleasant enough. I can't say that I'm inspired to pre-order the next novella in this series, but I also wouldn't object to reading it. If you're in the mood for gender-swapped Holmes in an exotic setting, you could do worse. Followed by The Imposition of Unnecessary Obstacles. Rating: 6 out of 10

29 May 2023

Russell Coker: Considering Convergence

What is Convergence In 2013 Kyle Rankin (at the time Linux Journal columnist and CSO of Purism) wrote a Linux Journal article about Linux convergence [1] (which means using a phone and a dock to replace a desktop) featuring the Nokia N900 smart phone and a chroot environment on the Motorola Droid 4 Android phone. Both of them have very limited hardware even by the standards of the day and neither of which were systems I d consider using all the time. None of the Android phones I used at that time were at all comparable to any sort of desktop system I d want to use. Hardware for Convergence Comparing a Phone to a Laptop The first hardware issue for convergence is docks and other accessories to attach a small computer to hardware designed for larger computers. Laptop docks have been around for decades and for decades I haven t been using them because they have all been expensive and specific to a particular model of laptop. Having an expensive dock at home and an expensive dock at the office and then replacing them both when the laptop is replaced may work well for some people but wasn t something I wanted to do. The USB-C interface supports data, power, and DisplayPort video over the same cable and now USB-C docks start at about $20 on eBay and dock functionality is built in to many new monitors. I can take a USB-C device to the office of any large company and know there s a good chance that there will be a USB-C dock ready for me to use. The fact that USB-C is a standard feature for phones gives obvious potential for convergence. The next issue is performance. The Passmark benchmark seems like a reasonable way to compare CPUs [2]. It may not be the best benchmark but it has an excellent set of published results for Intel and AMD CPUs. I ran that benchmark on my Librem5 [3] and got a result of 507 for the CPU score. At the end of 2017 I got a Thinkpad X301 [4] which rates 678 on Passmark. So the Librem5 has 3/4 the CPU power of a laptop that was OK for my use in 2018. Given that the X301 was about the minimum specs for a PC that I can use (for things other than serious compiles, running VMs, etc) the Librem 5 has 3/4 the CPU power, only 3G of RAM compared to 6G, and 32G of storage compared to 64G. Here is the Passmark page for my Librem5 [5]. As an aside my Libnrem5 is apparently 25% faster than the other results for the same CPU did the Purism people do something to make their device faster than most? For me the Librem5 would be at the very low end of what I would consider a usable desktop system. A friend s N900 (like the one Kyle used) won t complete the Passmark test apparently due to the Extended Instructions (NEON) test failing. But of the rest of the tests most of them gave a result that was well below 10% of the result from the Librem5 and only the Compression and CPU Single Threaded tests managed to exceed 1/4 the speed of the Librem5. One thing to note when considering the specs of phones vs desktop systems is that the MicroSD cards designed for use in dashcams and other continuous recording devices have TBW ratings that compare well to SSDs designed for use in PCs, so swap to a MicroSD card should work reasonably well and be significantly faster than the hard disks I was using for swap in 2013! In 2013 I was using a Thinkpad T420 as my main system [6], it had 8G of RAM (the same as my current laptop) although I noted that 4G was slow but usable at the time. Basically it seems that the Librem5 was about the sort of hardware I could have used for convergence in 2013. But by today s standards and with the need to drive 4K monitors etc it s not that great. The N900 hardware specs seem very similar to the Thinkpads I was using from 1998 to about 2003. However a device for convergence will usually do more things than a laptop (IE phone and camera functionality) and software had become significantly more bloated in 1998 to 2013 time period. A Linux desktop system performed reasonably with 32MB of RAM in 1998 but by 2013 even 2G was limiting. Software Issues for Convergence Jeremiah Foster (Director PureOS at Purism) wrote an interesting overview of some of the software issues of convergence [7]. One of the most obvious is that the best app design for a small screen is often very different from that for a large screen. Phone apps usually have a single window that shows a view of only one part of the data that is being worked on (EG an email program that shows a list of messages or the contents of a single message but not both). Desktop apps of any complexity will either have support for multiple windows for different data (EG two messages displayed in different windows) or a single window with multiple different types of data (EG message list and a single message). What we ideally want is all the important apps to support changing modes when the active display is changed to one of a different size/resolution. The Purism people are doing some really good work in this regard. But it is a large project that needs to involve a huge range of apps. The next thing that needs to be addressed is the OS interface for managing apps and metadata. On a phone you swipe from one part of the screen to get a list of apps while on a desktop you will probably have a small section of a large monitor reserved for showing a window list. On a desktop you will typically have an app to manage a list of items copied to the clipboard while on Android and iOS there is AFAIK no standard way to do that (there is a selection of apps in the Google Play Store to do this sort of thing). Purism has a blog post by Sebastian Krzyszkowiak about some of the development of the OS to make it work better for convergence and the status of getting it in Debian [8]. The limitations in phone hardware force changes to the software. Software needs to use less memory because phone RAM can t be upgraded. The OS needs to be configured for low RAM use which includes technologies like the zram kernel memory compression feature. Security When mobile phones first came out they were used for less secret data. Loss of a phone was annoying and expensive but not a security problem. Now phone theft for the purpose of gaining access to resources stored on the phone is becoming a known crime, here is a news report about a thief stealing credit cards and phones to receive the SMS notifications from banks [9]. We should expect that trend to continue, stealing mobile devices for ssh keys, management tools for cloud services, etc is something we should expect to happen. A problem with mobile phones in current use is that they have one login used for all access from trivial things done in low security environments (EG paying for public transport) to sensitive things done in more secure environments (EG online banking and healthcare). Some applications take extra precautions for this EG the Android app I use for online banking requires authentication before performing any operations. The Samsung version of Android has a system called Knox for running a separate secured workspace [10]. I don t think that the Knox approach would work well for a full Linux desktop environment, but something that provides some similar features would be a really good idea. Also running apps in containers as much as possible would be a good security feature, this is done by default in Android and desktop OSs could benefit from it. The Linux desktop security model of logging in to a single account and getting access to everything has been outdated for a long time, probably ever since single-user Linux systems became popular. We need to change this for many reasons and convergence just makes it more urgent. Conclusion I have become convinced that convergence is the way of the future. It has the potential to make transporting computers easier, purchasing cheaper (buy just a phone and not buy desktop and laptop systems), and access to data more convenient. The Librem5 doesn t seem up to the task for my use due to being slow and having short battery life, the PinePhone Pro has more powerful hardware and allegedly has better battery life [11] so it might work for my needs. The PinePhone Pro probably won t meet the desktop computing needs of most people, but hardware keeps getting faster and cheaper so eventually most people could have their computing needs satisfied with a phone. The current state of software for convergence and for Linux desktop security needs some improvement. I have some experience with Linux security so this is something I can help work on. To work on improving this I asked Linux Australia for a grant for me and a friend to get PinePhone Pro devices and a selection of accessories to go with them. Having both a Librem5 and a PinePhone Pro means that I can test software in different configurations which will make developing software easier. Also having a friend who s working on similar things will help a lot, especially as he has some low level hardware skills that I lack. Linux Australia awarded the grant and now the PinePhones are in transit. Hopefully I will have a PinePhone in a couple of weeks to start work on this.

23 May 2023

Craig Small: Devices with cgroup v2

Docker and other container systems by default restrict access to devices on the host. They used to do this with cgroups with the cgroup v1 system, however, the second version of cgroups removed this controller and the man page says:
Cgroup v2 device controller has no interface files and is implemented on top of cgroup BPF.
https://www.kernel.org/doc/Documentation/admin-guide/cgroup-v2.rst
That is just awesome, nothing to see here, go look at the BPF documents if you have cgroup v2. With cgroup v1 if you wanted to know what devices were permitted, you just would cat /sys/fs/cgroup/XX/devices.allow and you were done! The kernel documentation is not very helpful, sure its something in BPF and has something to do with the cgroup BPF specifically, but what does that mean? There doesn t seem to be an easy corresponding method to get the same information. So to see what restrictions a docker container has, we will have to:
  1. Find what cgroup the programs running in the container belong to
  2. Find what is the eBPF program ID that is attached to our container cgroup
  3. Dump the eBPF program to a text file
  4. Try to interpret the eBPF syntax
The last step is by far the most difficult.

Finding a container s cgroup All containers have a short ID and a long ID. When you run the docker ps command, you get the short id. To get the long id you can either use the --no-trunc flag or just guess from the short ID. I usually do the second.
$ docker ps 
CONTAINER ID   IMAGE            COMMAND       CREATED          STATUS          PORTS     NAMES
a3c53d8aaec2   debian:minicom   "/bin/bash"   19 minutes ago   Up 19 minutes             inspiring_shannon
So the short ID is a3c53d8aaec2 and the long ID is a big ugly hex string starting with that. I generally just paste the relevant part in the next step and hit tab. For this container the cgroup is /sys/fs/cgroup/system.slice/docker-a3c53d8aaec23c256124f03d208732484714219c8b5f90dc1c3b4ab00f0b7779.scope/ Notice that the last directory has docker- then the short ID. If you re not sure of the exact path. The /sys/fs/cgroup is the cgroup v2 mount point which can be found with mount -t cgroup2 and then rest is the actual cgroup name. If you know the process running in the container then the cgroup column in ps will show you.
$ ps -o pid,comm,cgroup 140064
    PID COMMAND         CGROUP
 140064 bash            0::/system.slice/docker-a3c53d8aaec23c256124f03d208732484714219c8b5f90dc1c3b4ab00f0b7779.scope
Either way, you will have your cgroup path.

eBPF programs and cgroups Next we will need to get the eBPF program ID that is attached to our recently found cgroup. To do this, we will need to use the bpftool. One thing that threw me for a long time is when the tool talks about a program or a PROG ID they are talking about the eBPF programs, not your processes! With that out of the way, let s find the prog id.
$ sudo bpftool cgroup list /sys/fs/cgroup/system.slice/docker-a3c53d8aaec23c256124f03d208732484714219c8b5f90dc1c3b4ab00f0b7779.scope/
ID       AttachType      AttachFlags     Name
90       cgroup_device   multi
Our cgroup is attached to eBPF prog with ID of 90 and the type of program is cgroup _device.

Dumping the eBPF program Next, we need to get the actual code that is run every time a process running in the cgroup tries to access a device. The program will take some parameters and will return either a 1 for yes you are allowed or a zero for permission denied. Don t use the file option as it dumps the program in binary format. The text version is hard enough to understand.
sudo bpftool prog dump xlated id 90 > myebpf.txt
Congratulations! You now have the eBPF program in a human-readable (?) format.

Interpreting the eBPF program The eBPF format as dumped is not exactly user friendly. It probably helps to first go and look at an example program to see what is going on. You ll see that the program splits type (lower 4 bytes) and access (higher 4 bytes) and then does comparisons on those values. The eBPF has something similar:
   0: (61) r2 = *(u32 *)(r1 +0)
   1: (54) w2 &= 65535
   2: (61) r3 = *(u32 *)(r1 +0)
   3: (74) w3 >>= 16
   4: (61) r4 = *(u32 *)(r1 +4)
   5: (61) r5 = *(u32 *)(r1 +8)
What we find is that once we get past the first few lines filtering the given value that the comparison lines have:
  • r2 is the device type, 1 is block, 2 is character.
  • r3 is the device access, it s used with r1 for comparisons after masking the relevant bits. mknod, read and write are 1,2 and 3 respectively.
  • r4 is the major number
  • r5 is the minor number
For a even pretty simple setup, you are going to have around 60 lines of eBPF code to look at. Luckily, you ll often find the lines for the command options you added will be near the end, which makes it easier. For example:
  63: (55) if r2 != 0x2 goto pc+4
  64: (55) if r4 != 0x64 goto pc+3
  65: (55) if r5 != 0x2a goto pc+2
  66: (b4) w0 = 1
  67: (95) exit
This is a container using the option --device-cgroup-rule='c 100:42 rwm'. It is checking if r2 (device type) is 2 (char) and r4 (major device number) is 0x64 or 100 and r5 (minor device number) is 0x2a or 42. If any of those are not true, move to the next section, otherwise return with 1 (permit). We have all access modes permitted so it doesn t check for it. The previous example has all permissions for our device with id 100:42, what about if we only want write access with the option --device-cgroup-rule='c 100:42 r'. The resulting eBPF is:
  63: (55) if r2 != 0x2 goto pc+7  
  64: (bc) w1 = w3
  65: (54) w1 &= 2
  66: (5d) if r1 != r3 goto pc+4
  67: (55) if r4 != 0x64 goto pc+3
  68: (55) if r5 != 0x2a goto pc+2
  69: (b4) w0 = 1
  70: (95) exit
The code is almost the same but we are checking that w3 only has the second bit set, which is for reading, effectively checking for X==X&2. It s a cautious approach meaning no access still passes but multiple bits set will fail.

The device option docker run allows you to specify files you want to grant access to your containers with the --device flag. This flag actually does two things. The first is to great the device file in the containers /dev directory, effectively doing a mknod command. The second thing is to adjust the eBPF program. If the device file we specified actually did have a major number of 100 and a minor of 42, the eBPF would look exactly like the above snippets.

What about privileged? So we have used the direct cgroup options here, what does the --privileged flag do? This lets the container have full access to all the devices (if the user running the process is allowed). Like the --device flag, it makes the device files as well, but what does the filtering look like? We still have a cgroup but the eBPF program is greatly simplified, here it is in full:
   0: (61) r2 = *(u32 *)(r1 +0)
   1: (54) w2 &= 65535
   2: (61) r3 = *(u32 *)(r1 +0)
   3: (74) w3 >>= 16
   4: (61) r4 = *(u32 *)(r1 +4)
   5: (61) r5 = *(u32 *)(r1 +8)
   6: (b4) w0 = 1
   7: (95) exit
There is the usual setup lines and then, return 1. Everyone is a winner for all devices and access types!

22 May 2023

Russ Allbery: Review: Tsalmoth

Review: Tsalmoth, by Steven Brust
Series: Vlad Taltos #16
Publisher: Tor
Copyright: 2023
ISBN: 1-4668-8970-5
Format: Kindle
Pages: 277
Tsalmoth is the sixteenth book in the Vlad Taltos series and (some fans of the series groan) yet another flashback novel to earlier in Vlad's life. It takes place between Yendi and the interludes in Dragon (or, perhaps more straightforwardly, between Yendi and Jhereg. Most of the books of this series stand alone to some extent, so you could read this book out of order and probably not be horribly confused, but I suspect it would also feel weirdly pointless outside of the context of the larger series. We're back to Vlad running a fairly small operation as a Jhereg, who are the Dragaeran version of organized crime. A Tsalmoth who owes Vlad eight hundred imperials has rudely gotten himself murdered, thoroughly enough that he can't be revived. That's a considerable amount of money, and Vlad would like it back, so he starts poking around. As you might expect if you've read any other book in this series, things then get a bit complicated. This time, they involve Jhereg politics, Tsalmoth house politics, and necromancy (which in this universe is more about dimensional travel than it is about resurrecting the dead). The main story is... fine. Kragar is around being unnoticeable as always, Vlad is being cocky and stubborn and bantering with everyone, and what appears to be a straightforward illegal business relationship turns out to involve Dragaeran magic and thus Vlad's highly-placed friends. As usual, they're intellectually curious about the magic and largely ambivalent to the rest of Vlad's endeavors. The most enjoyable part of the story is Vlad's insistence on getting his money back while everyone else in the story cannot believe he would be this persistent over eight hundred imperials and is certain he has some other motive. It's otherwise a fairly forgettable little adventure. The implications for the broader series, though, are significant, although essentially none of the payoff is here. Brust has been keeping a major secret about Vlad that's finally revealed here, one that has little impact on the plot of this book (although it causes Vlad a lot of angst) but which I suspect will become very important later in the series. That was intriguing but rather unsatisfying, since it stays only a future hook with an attached justification for why we're only finding out about it now. If one has read the rest of the series, it's also nice to see Vlad and Cawti working together, bantering with each other and playing off of each other's strengths. It's reminiscent of the best parts of Yendi. As with many of the books of this series, the chapter introductions tell a parallel story; this time, it's Vlad and Cawti's wedding. I think previous books already mentioned that Vlad is narrating this series into some sort of recording device, and a bit about why he's doing that, but this is made quite explicit here. We get as much of the surrounding frame as we've ever seen before. There are no obvious plot consequences from this it's still all hints and guesswork but I suspect this will also become important by the end of the series. If you've read this much of the series, you'll obviously want to read this one as well, but unfortunately don't get your hopes up for significant plot advancement. This is another station-keeping book, which is a bit of a disappointment. We haven't gotten major plot advancement since Hawk in 2014, and I'm getting impatient. Thankfully, Lyorn has a release date already (April 9, 2024), and assuming all goes according to the grand plan, there are only two books left after Lyorn (Chreotha and The Last Contract). I'm getting hopeful that we're going to get to see the entire series. Meanwhile, I am very tempted to do a complete re-read of the series to date, probably in series chronological order rather than in publication order (as much as that's possible given the fractured timelines of Dragon and Tiassa) so that I can see how the pieces fit together. The constant jumping back and forth and allusions to events that have already happened but that we haven't seen yet is hard to keep track of. I'm very glad the Lyorn Records exists. Followed by Lyorn. Rating: 7 out of 10

15 May 2023

Sven Hoexter: GCP: Private Service Connect Forwarding Rules can not be Updated

PSA for those foolish enough to use Google Cloud and try to use private service connect: If you want to change the serviceAttachment your private service connect forwarding rule points at, you must delete the forwarding rule and create a new one. Updates are not supported. I've done that in the past via terraform, but lately encountered strange errors like this:
Error updating ForwardingRule: googleapi: Error 400: Invalid value for field 'target.target':
'<https://www.googleapis.com/compute/v1/projects/mydumbproject/regions/europe-west1/serviceAttachments/
k8s1-sa-xyz-abc>'. Unexpected resource collection 'serviceAttachments'., invalid
Worked around that with the help of terrraform_data and lifecycle:
resource "terraform_data" "replacement"  
    input = var.gcp_psc_data["target"]
 
resource "google_compute_forwarding_rule" "this"  
    count   = length(var.gcp_psc_data["target"]) > 0 ? 1 : 0
    name    = "$ var.gcp_psc_name -psc"
    region  = var.gcp_region
    project = var.gcp_project
    target                = var.gcp_psc_data["target"]
    load_balancing_scheme = "" # need to override EXTERNAL default when target is a service attachment
    network               = var.gcp_network
    ip_address            = google_compute_address.this.id
    lifecycle  
        replace_triggered_by = [
            terraform_data.replacement
        ]
     
 
See also terraform data for replace_triggered_by.

9 May 2023

C.J. Collier: Instructions for installing Proxmox onto the Qotom device

These instructions are for qotom devices Q515P and Q1075GE. You can order one from Amazon or directly from Cherry Ni <export03@qotom.com>. Instructions are for those coming from Windows. Prerequisites: To find your windows network details, run the following command at the command prompt:
netsh interface ip show addresses
Here s my output:
PS C:\Users\cjcol> netsh interface ip show addresses "Wi-Fi"
Configuration for interface "Wi-Fi"
    DHCP enabled:                         Yes
    IP Address:                           172.16.79.53
    Subnet Prefix:                        172.16.79.0/24 (mask 255.255.255.0)
    Default Gateway:                      172.16.79.1
    Gateway Metric:                       0
    InterfaceMetric:                      50
Did you follow the instructions linked above in the prerequisites section? If not, take a moment to do so now.
Open Rufus and select the proxmox iso which you downloaded. You may be warned that Rufus will be acting as dd.
Don t forget to select the USB drive that you want to write the image to. In my example, the device is creatively called NO_LABEL .
You may be warned that re-imaging the USB disk will result in the previous data on the USB disk being lost.
Once the process is complete, the application will indicate that it is complete.
You should now have a USB disk with the Proxmox installer image on it. Place the USB disk into one of the blue, USB-3.0, USB-A slots on the Qotom device so that the system can read the installer image from it at full speed. The Proxmox installer requires a keyboard, video and mouse. Please attach these to the device along with inserting the USB disk you just created. Press the power button on the Qotom device. Press the F11 key repeatedly until you see the AMI BIOS menu. Press F11 a couple more times. You ll be presented with a boot menu. One of the options will launch the Proxmox installer. By trial and error, I found that the correct boot menu option was UEFI OS Once you select the correct option, you will be presented with a menu that looks like this. Select the default option and install. During the install, you will be presented with an option of the block device to install to. I think there s only a single block device in this celeron, but if there are more than one, I prefer the smaller one for the ProxMox OS. I also make a point to limit the size of the root filesystem to 16G. I think it will take up the entire volume group if you don t set a limit. Okay, I ll do another install and select the correct filesystem. If you read this far and want me to add some more screenshots and better instructions, leave a comment.

29 April 2023

Russ Allbery: INN 2.7.1

This is a bug fix and minor feature release over INN 2.7.0, and the upgrade should be painless. You can download the new release from ISC or my personal INN pages. The latter also has links to the full changelog and the other INN documentation. As of this release, we're no longer generating hashes and signed hashes. Instead, the release is a simple tarball and a detached GnuPG signature, similar to my other software releases. We're also maintaining the releases in parallel on GitHub. For the full list of changes, see the INN 2.7.1 NEWS file. As always, thanks to Julien LIE for preparing this release and doing most of the maintenance work on INN!

27 April 2023

Jonathan McDowell: Repurposing my C.H.I.P.

Way back at DebConf16 Gunnar managed to arrange for a number of Next Thing Co. C.H.I.P. boards to be distributed to those who were interested. I was lucky enough to be amongst those who received one, but I have to confess after some initial experimentation it ended up sitting in its box unused. The reasons for that were varied; partly about not being quite sure what best to do with it, partly due to a number of limitations it had, partly because NTC sadly went insolvent and there was less momentum around the hardware. I ve always meant to go back to it, poking it every now and then but never completing a project. I m finally almost there, and I figure I should write some of it up. TL;DR: My C.H.I.P. is currently running a mainline Linux 6.3 kernel with only a few DTS patches, an upstream u-boot v2022.1 with a couple of minor patches and an unmodified Debian bullseye armhf userspace.

Storage The main issue with the C.H.I.P. is that it uses MLC NAND, in particular mine has an 8MB H27QCG8T2E5R. That ended up unsupported in Linux, with the UBIFS folk disallowing operation on MLC devices. There s been subsequent work to enable an SLC emulation mode which makes the device more reliable at the cost of losing capacity by pairing up writes/reads in cells (AFAICT). Some of this hit for the H27UCG8T2ETR in 5.16 kernels, but I definitely did some experimentation with 5.17 without having much success. I should maybe go back and try again, but I ended up going a different route. It turned out that BytePorter had documented how to add a microSD slot to the NTC C.H.I.P., using just a microSD to full SD card adapter. Every microSD card I buy seems to come with one of these, so I had plenty lying around to test with. I started with ensuring the kernel could see it ok (by modifying the device tree), but once that was all confirmed I went further and built a more modern u-boot that talked to the SD card, and defaulted to booting off it. That meant no more relying on the internal NAND at all! I do see some flakiness with the SD card, which is possibly down to the dodgy way it s hooked up (I should probably do a basic PCB layout with JLCPCB instead). That s mostly been mitigated by forcing it into 1-bit mode instead of 4-bit mode (I tried lowering the frequency too, but that didn t make a difference). The problem manifests as:
sunxi-mmc 1c11000.mmc: data error, sending stop command
and then all storage access freezing (existing logins still work, if the program you re trying to run is in cache). I can t find a conclusive software solution to this; I m pretty sure it s the hardware, but I don t understand why the recovery doesn t generally work.

Random power offs After I had storage working I d see random hangs or power offs. It wasn t quite clear what was going on. So I started trying to work out how to find out the CPU temperature, in case it was overheating. It turns out the temperature sensor on the R8 is part of the touchscreen driver, and I d taken my usual approach of turning off all the drivers I didn t think I d need. Enabling it (CONFIG_TOUCHSCREEN_SUN4I) gave temperature readings and seemed to help somewhat with stability, though not completely. Next I ended up looking at the AXP209 PMIC. There were various scripts still installed (I d started out with the NTC Debian install and slowly upgraded it to bullseye while stripping away the obvious pieces I didn t need) and a start-up script called enable-no-limit. This turned out to not be running (some sort of expectation of i2c-dev being loaded and another failing check), but looking at the script and the data sheet revealed the issue. The AXP209 can cope with 3 power sources; an external DC source, a Li-battery, and finally a USB port. I was powering my board via the USB port, using a charger rated for 2A. It turns out that the AXP209 defaults to limiting USB current to 900mA, and that with wifi active and the CPU busy the C.H.I.P. can rise above that. At which point the AXP shuts everything down. Armed with that info I was able to understand what the power scripts were doing and which bit I needed - i2cset -f -y 0 0x34 0x30 0x03 to set no limit and disable the auto-power off. Additionally I also discovered that the AXP209 had a built in temperature sensor as well, so I added support for that via iio-hwmon.

WiFi WiFi on the C.H.I.P. is provided by an RTL8723BS SDIO attached device. It s terrible (and not just here, I had an x86 based device with one where it also sucked). Thankfully there s a driver in staging in the kernel these days, but I ve still found it can fall out with my house setup, end up connecting to a further away AP which then results in lots of retries, dropped frames and CPU consumption. Nailing it to the AP on the other side of the wall from where it is helps. I haven t done any serious testing with the Bluetooth other than checking it s detected and can scan ok.

Patches I patched u-boot v2022.01 (which shows you how long ago I was trying this out) with the following to enable boot from external SD:
u-boot C.H.I.P. external SD patch
diff --git a/arch/arm/dts/sun5i-r8-chip.dts b/arch/arm/dts/sun5i-r8-chip.dts
index 879a4b0f3b..1cb3a754d6 100644
--- a/arch/arm/dts/sun5i-r8-chip.dts
+++ b/arch/arm/dts/sun5i-r8-chip.dts
@@ -84,6 +84,13 @@
 		reset-gpios = <&pio 2 19 GPIO_ACTIVE_LOW>; /* PC19 */
 	 ;
 
+	mmc2_pins_e: mmc2@0  
+		pins = "PE4", "PE5", "PE6", "PE7", "PE8", "PE9";
+		function = "mmc2";
+		drive-strength = <30>;
+		bias-pull-up;
+	 ;
+
 	onewire  
 		compatible = "w1-gpio";
 		gpios = <&pio 3 2 GPIO_ACTIVE_HIGH>; /* PD2 */
@@ -175,6 +182,16 @@
 	status = "okay";
  ;
 
+&mmc2  
+	pinctrl-names = "default";
+	pinctrl-0 = <&mmc2_pins_e>;
+	vmmc-supply = <&reg_vcc3v3>;
+	vqmmc-supply = <&reg_vcc3v3>;
+	bus-width = <4>;
+	broken-cd;
+	status = "okay";
+ ;
+
 &ohci0  
 	status = "okay";
  ;
diff --git a/arch/arm/include/asm/arch-sunxi/gpio.h b/arch/arm/include/asm/arch-sunxi/gpio.h
index f3ab1aea0e..c0dfd85a6c 100644
--- a/arch/arm/include/asm/arch-sunxi/gpio.h
+++ b/arch/arm/include/asm/arch-sunxi/gpio.h
@@ -167,6 +167,7 @@ enum sunxi_gpio_number  
 
 #define SUN8I_GPE_TWI2		3
 #define SUN50I_GPE_TWI2		3
+#define SUNXI_GPE_SDC2		4
 
 #define SUNXI_GPF_SDC0		2
 #define SUNXI_GPF_UART0		4
diff --git a/board/sunxi/board.c b/board/sunxi/board.c
index fdbcd40269..f538cb7e20 100644
--- a/board/sunxi/board.c
+++ b/board/sunxi/board.c
@@ -433,9 +433,9 @@ static void mmc_pinmux_setup(int sdc)
 			sunxi_gpio_set_drv(pin, 2);
 		 
 #elif defined(CONFIG_MACH_SUN5I)
-		/* SDC2: PC6-PC15 */
-		for (pin = SUNXI_GPC(6); pin <= SUNXI_GPC(15); pin++)  
-			sunxi_gpio_set_cfgpin(pin, SUNXI_GPC_SDC2);
+		/* SDC2: PE4-PE9 */
+		for (pin = SUNXI_GPE(4); pin <= SUNXI_GPE(9); pin++)  
+			sunxi_gpio_set_cfgpin(pin, SUNXI_GPE_SDC2);
 			sunxi_gpio_set_pull(pin, SUNXI_GPIO_PULL_UP);
 			sunxi_gpio_set_drv(pin, 2);
 		 

I ve sent some patches for the kernel device tree upstream - there s an outstanding issue with the Bluetooth wake GPIO causing the serial port not to probe(!) that I need to resolve before sending a v2, but what s there works for me. The only remaining piece is patch to enable the external SD for Linux; I don t think it s appropriate to send upstream but it s fairly basic. This limits the bus to 1 bit rather than the 4 bits it s capable of, as mentioned above.
Linux C.H.I.P. external SD DTS patch diff diff --git a/arch/arm/boot/dts/sun5i-r8-chip.dts b/arch/arm/boot/dts/sun5i-r8-chip.dts index fd37bd1f3920..2b5aa4952620 100644 --- a/arch/arm/boot/dts/sun5i-r8-chip.dts +++ b/arch/arm/boot/dts/sun5i-r8-chip.dts @@ -163,6 +163,17 @@ &mmc0 status = "okay"; ; +&mmc2 + pinctrl-names = "default"; + pinctrl-0 = <&mmc2_4bit_pe_pins>; + vmmc-supply = <&reg_vcc3v3>; + vqmmc-supply = <&reg_vcc3v3>; + bus-width = <1>; + non-removable; + disable-wp; + status = "okay"; + ; + &ohci0 status = "okay"; ;

As for what I m doing with it, I think that ll have to be a separate post.

Simon Josefsson: A Security Device Threat Model: The Substitution Attack

I d like to describe and discuss a threat model for computational devices. This is generic but we will narrow it down to security-related devices. For example, portable hardware dongles used for OpenPGP/OpenSSH keys, FIDO/U2F, OATH HOTP/TOTP, PIV, payment cards, wallets etc and more permanently attached devices like a Hardware Security Module (HSM), a TPM-chip, or the hybrid variant of a mostly permanently-inserted but removable hardware security dongles. Our context is cryptographic hardware engineering, and the purpose of the threat model is to serve as as a thought experiment for how to build and design security devices that offer better protection. The threat model is related to the Evil maid attack. Our focus is to improve security for the end-user rather than the traditional focus to improve security for the organization that provides the token to the end-user, or to improve security for the site that the end-user is authenticating to. This is a critical but often under-appreciated distinction, and leads to surprising recommendations related to onboard key generation, randomness etc below.

The Substitution Attack
An attacker is able to substitute any component of the device (hardware or software) at any time for any period of time.
Your takeaway should be that devices should be designed to mitigate harmful consequences if any component of the device (hardware or software) is substituted for a malicious component for some period of time, at any time, during the lifespan of that component. Some designs protect better against this attack than other designs, and the threat model can be used to understand which designs are really bad, and which are less so.

Terminology The threat model involves at least one device that is well-behaving and one that is not, and we call these Good Device and Bad Device respectively. The bad device may be the same physical device as the good key, but with some minor software modification or a minor component replaced, but could also be a completely separate physical device. We don t care about that distinction, we just care if a particular device has a malicious component in it or not. I ll use terms like security device , device , hardware key , security co-processor etc interchangeably. From an engineering point of view, malicious here includes unintentional behavior such as software or hardware bugs. It is not possible to differentiate an intentionally malicious device from a well-designed device with a critical bug. Don t attribute to malice what can be adequately explained by stupidity, but don t na vely attribute to stupidity what may be deniable malicious.

What is some period of time ? Some period of time can be any length of time: seconds, minutes, days, weeks, etc. It may also occur at any time: During manufacturing, during transportation to the user, after first usage by the user, or after a couple of months usage by the user. Note that we intentionally consider time-of-manufacturing as a vulnerable phase. Even further, the substitution may occur multiple times. So the Good Key may be replaced with a Bad Key by the attacker for one day, then returned, and later this repeats a month later.

What is harmful consequences ? Since a security key has a fairly well-confined scope and purpose, we can get a fairly good exhaustive list of things that could go wrong. Harmful consequences include:
  • Attacker learns any secret keys stored on a Good Key.
  • Attacker causes user to trust a public generated by a Bad Key.
  • Attacker is able to sign something using a Good Key.
  • Attacker learns the PIN code used to unlock a Good Key.
  • Attacker learns data that is decrypted by a Good Key.

Thin vs Deep solutions One approach to mitigate many issues arising from device substitution is to have the host (or remote site) require that the device prove that it is the intended unique device before it continues to talk to it. This require an authentication/authorization protocol, which usually involves unique device identity and out-of-band trust anchors. Such trust anchors is often problematic, since a common use-case for security device is to connect it to a host that has never seen the device before. A weaker approach is to have the device prove that it merely belongs to a class of genuine devices from a trusted manufacturer, usually by providing a signature generated by a device-specific private key signed by the device manufacturer. This is weaker since then the user cannot differentiate two different good devices. In both cases, the host (or remote site) would stop talking to the device if it cannot prove that it is the intended key, or at least belongs to a class of known trusted genuine devices. Upon scrutiny, this solution is still vulnerable to a substitution attack, just earlier in the manufacturing chain: how can the process that injects the per-device or per-class identities/secrets know that it is putting them into a good key rather than a malicious device? Consider also the consequences if the cryptographic keys that guarantee that a device is genuine leaks. The model of the thin solution is similar to the old approach to network firewalls: have a filtering firewall that only lets through intended traffic, and then run completely insecure protocols internally such as telnet. The networking world has evolved, and now we have defense in depth: even within strongly firewall ed networks, it is prudent to run for example SSH with publickey-based user authentication even on locally physical trusted networks. This approach requires more thought and adds complexity, since each level has to provide some security checking. I m arguing we need similar defense-in-depth for security devices. Security key designs cannot simply dodge this problem by assuming it is working in a friendly environment where component substitution never occur.

Example: Device authentication using PIN codes To see how this threat model can be applied to reason about security key designs, let s consider a common design. Many security keys uses PIN codes to unlock private key operations, for example on OpenPGP cards that lacks built-in PIN-entry functionality. The software on the computer just sends a PIN code to the device, and the device allows private-key operations if the PIN code was correct. Let s apply the substitution threat model to this design: the attacker replaces the intended good key with a malicious device that saves a copy of the PIN code presented to it, and then gives out error messages. Once the user has entered the PIN code and gotten an error message, presumably temporarily giving up and doing other things, the attacker replaces the device back again. The attacker has learnt the PIN code, and can later use this to perform private-key operations on the good device. This means a good design involves not sending PIN codes in clear, but use a stronger authentication protocol that allows the card to know that the PIN was correct without learning the PIN. This is implemented optionally for many OpenPGP cards today as the key-derivation-function extension. That should be mandatory, and users should not use setups that sends device authentication in the clear, and ultimately security devices should not even include support for that. Compare how I build Gnuk on my PGP card with the kdf_do=required option.

Example: Onboard non-predictable key-generation Many devices offer both onboard key-generation, for example OpenPGP cards that generate a Ed25519 key internally on the devices, or externally where the device imports an externally generated cryptographic key. Let s apply the subsitution threat model to this design: the user wishes to generate a key and trust the public key that came out of that process. The attacker substitutes the device for a malicious device during key-generation, imports the private key into a good device and gives that back to the user. Most of the time except during key generation the user uses a good device but still the attacker succeeded in having the user trust a public key which the attacker knows the private key for. The substitution may be a software modification, and the method to leak the private key to the attacker may be out-of-band signalling. This means a good design never generates key on-board, but imports them from a user-controllable environment. That approach should be mandatory, and users should not use setups that generates private keys on-board, and ultimately security devices should not even include support for that.

Example: Non-predictable randomness-generation Many devices claims to generate random data, often with elaborate design documents explaining how good the randomness is. Let s apply the substitution threat model to this design: the attacker replaces the intended good key with a malicious design that generates (for the attacker) predictable randomness. The user will never be able to detect the difference since the random output is, well, random, and typically not distinguishable from weak randomness. The user cannot know if any cryptographic keys generated by a generator was faulty or not. This means a good design never generates non-predictable randomness on the device. That approach should be mandatory, and users should not use setups that generates non-predictable randomness on the device, and ideally devices should not have this functionality.

Case-Study: Tillitis I have warmed up a bit for this. Tillitis is a new security device with interesting properties, and core to its operation is the Compound Device Identifier (CDI), essentially your Ed25519 private key (used for SSH etc) is derived from the CDI that is computed like this:
cdi = blake2s(UDS, blake2s(device_app), USS)
Let s apply the substitution threat model to this design: Consider someone replacing the Tillitis key with a malicious key during postal delivery of the key to the user, and the replacement device is identical with the real Tillitis key but implements the following key derivation function:
cdi = weakprng(UDS , weakprng(device_app), USS)
Where weakprng is a compromised algorithm that is predictable for the attacker, but still appears random. Everything will work correctly, but the attacker will be able to learn the secrets used by the user, and the user will typically not be able to tell the difference since the CDI is secret and the Ed25519 public key is not self-verifiable.

Conclusion Remember that it is impossible to fully protect against this attack, that s why it is merely a thought experiment, intended to be used during design of these devices. Consider an attacker that never gives you access to a good key and as a user you only ever use a malicious device. There is no way to have good security in this situation. This is not hypothetical, many well-funded organizations do what they can to derive people from having access to trustworthy security devices. Philosophically it does not seem possible to tell if these organizations have succeeded 100% already and there are only bad security devices around where further resistance is futile, but to end on an optimistic note let s assume that there is a non-negligible chance that they haven t succeeded. In these situations, this threat model becomes useful to improve the situation by identifying less good designs, and that s why the design mantra of mitigate harmful consequences is crucial as a takeaway from this. Let s improve the design of security devices that further the security of its users!

Next.

Previous.